
The Living Clean Guide to Non-Toxic Camping Gear (Part 7) – Cooking Food


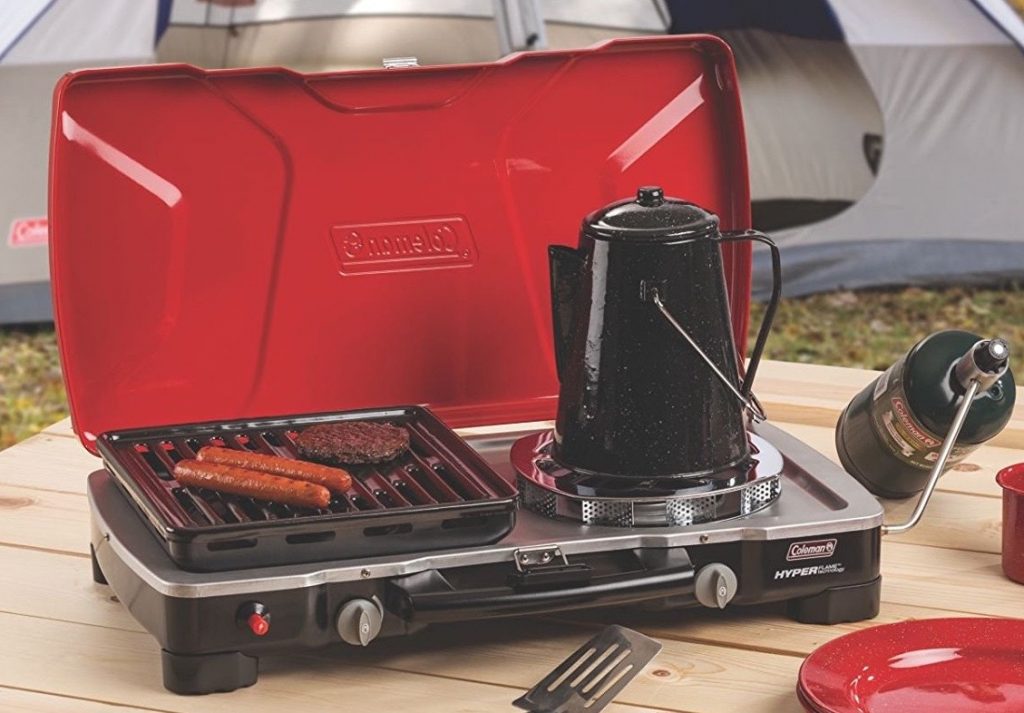
The Coleman Oven.
May 1, 2018
By Lisa Petrison
Introduction goes here
Introduction goes here
Introduction goes here
Introduction goes here
Introduction goes here
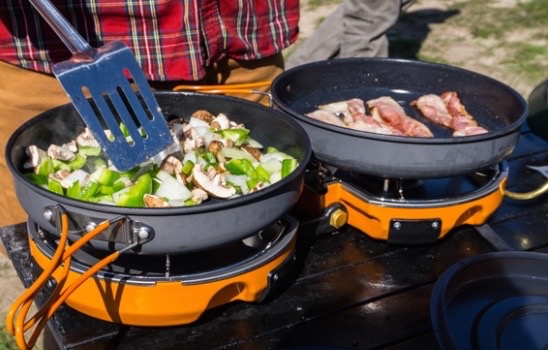
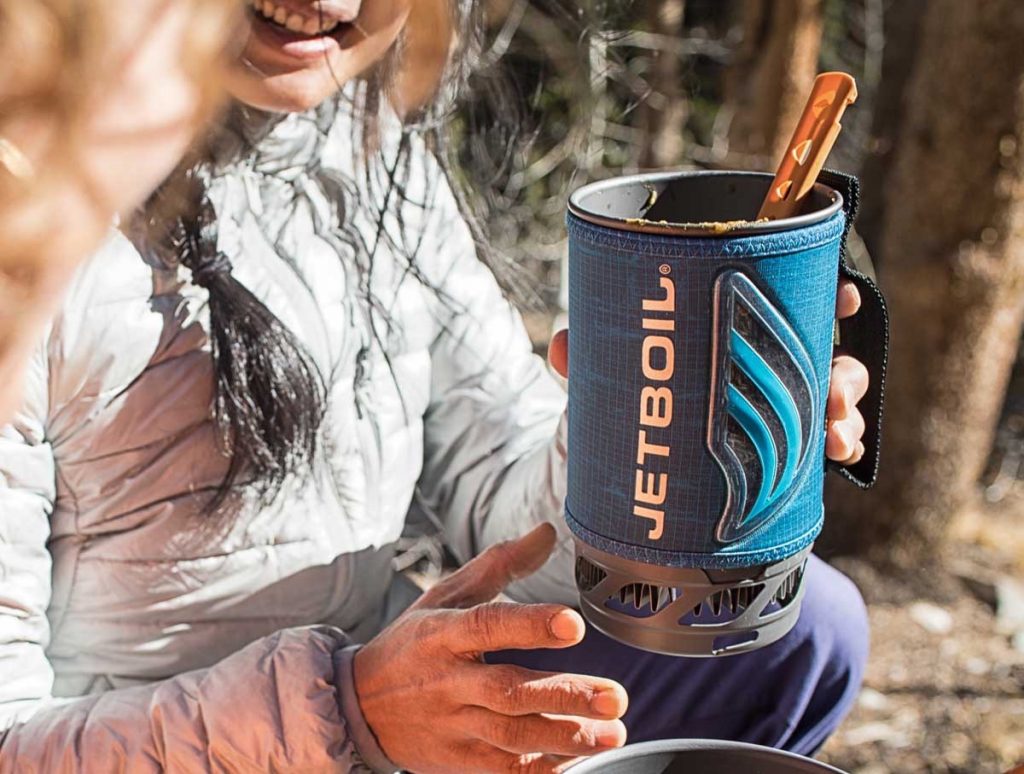
The Jetboil Genesis Basecamp System Camp Stove. Photo Credit: Ryan Dunfee/Teton Gravity Research.
TWO-BURNER CAMP STOVES
The outdoor stove that I used during my camping years was the Coleman Perfect Flow Grill Stove. It included a single burner and a grill area that I often used as a second burner (although I learned after quite a few years that this is not something that the company recommends).
I’m not eager to replace the stove with the same model though. The fact that the grill is made of aluminum now concerns me, and I would like to have the option of cooking with two burners, and it was hard to keep the grill stove clean because of the cooking grease, and there was a late incident where a plastic section of the unit caught on fire.
I am thinking that I now would like a stove that is as compact as possible but that still would be capable of doing a decent job cooking simple meals. Preferably it would include a gas grill, but that is not a necessity.
I also need to be able to boil water quickly and easily when I do not have access to electricity, for general camping use (e.g. hot water bottles, bathing, doing dishes, washing clothes) as well as for making tea and coffee.
One stove that I am currently considering is the Coleman Fold N Go Stove. It folds up fairly compactly, is pretty light (9 pounds), and has standard 10,000 BTU burners.
Although some people complain about its lack of a windscreen, I could buy one of those separately.
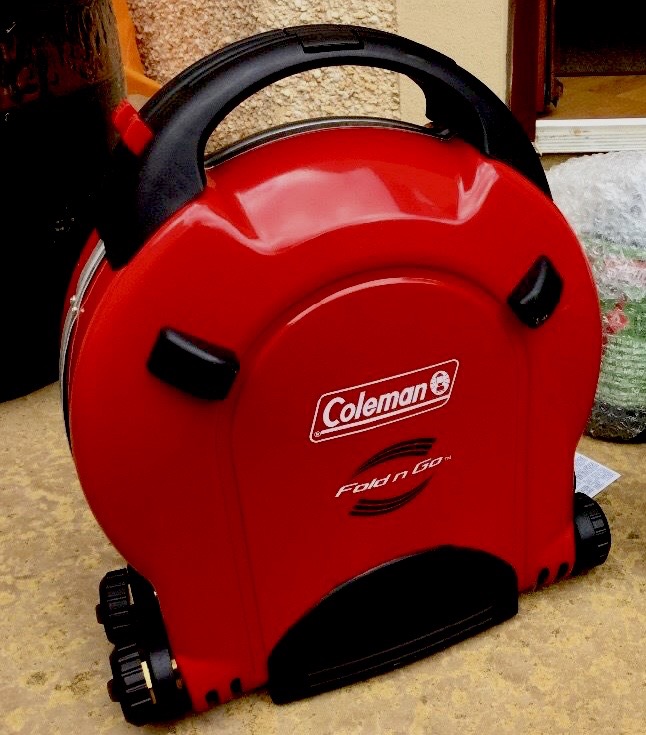
The Coleman Fold N Go Stove.
The main other objection that people bring up with regard to the Coleman Fold N Go is that its grates hold pans too high above the burners, causing the food to cook slowly.
Some suggested hacks that I would consider trying are 1) put pebbles inside the burners rather than using the included grates or 2) leave the included 7″ grates in their stored position and then use standard round grates – such as maybe Frigidaire Burner Grates – on top of the included grates.
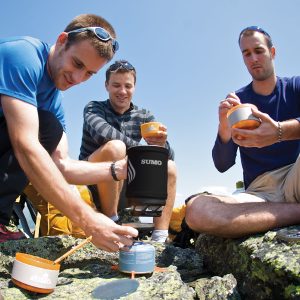
I also have spent some time looking into the Jetboil Genesis Stove.
The stove seems quite similar to the Coleman Fold N Go, except that it stores considerably more compactly and is more than twice the price.
Specifically, the Genesis is about 10″ x 10″ x 5″ and about 6 pounds when in its stored position.
On the other hand, the Coleman Fold N Go is about 12″ x 11″ x 11″ and about 9 pounds when folded for storage.
Burners for the Jetboil Genesis are 10,000 BTU’s and are said to have the easy ability to be turned way down to a low temperature for simmering purposes.
The Jetboil Genesis comes with its own soft carrying case. This is in contrast to the Fold N Go and other two-burner stoves discussed here, all of which have cases that must be purchased separately (usually for a cost of about $30).
The Genesis also comes with a windscreen.
The Genesis also is available in an even more expensive Basecamp System version, which includes a 5 liter pot (anodized aluminum) and a 10″ skillet (non-stick ceramic-covered aluminum) serving as a hard protective case for the stove.
The large pot is said to fit the stove burner tightly, allowing water to be boiled super-quickly (quite possibly more quickly than on any other tabletop camp stove on the planet).
I doubt that I would use either of those pans for cooking and might even sell the frypan on eBay if I bought that set.

The Eureka Spire.
However, now that I do not have a water heater, the idea of being able to quickly boil sufficient quantities of water to use for bathing, washing dishes and doing laundry is going to be important. It may well be that buying this stove and the associated pot would be the best way to accomplish that goal.
A lot of people seem to really like the Jetboil Genesis, and it seems like it might be perfect for van living if it worked.
I had a chance to see it in person and it looks like a wonderful piece – solidly made and very compact.
However, I have seen quite a few complaints about quality control issues, and the company provides only a one-year warranty. Although most of the complaints were from more than a year ago, I don’t know if the apparent issues have been fixed or not.
My feeling about the Genesis, therefore, is that if I were going to be living in my van full-time and using the stove every day, it very well might be worth taking the risk that it would break after a year since I would have already gotten my money’s worth out of it.
For just occasional use, as I am planning now, I’m not sure it’s worth taking the chance that will stop working after I have not gotten much use out of it though.
If the stove were less expensive, or if the company were offering a better warranty on its products, or if I were planning to use it every day, then I would be super-interested in it, however.
Another stove that I have been considering is the Eureka Spire LX, which I purchased from L.L. Bean at a very good sale price so that I could take a look at it. It is a suitcase-style stove with two 10,000 BTU burners.
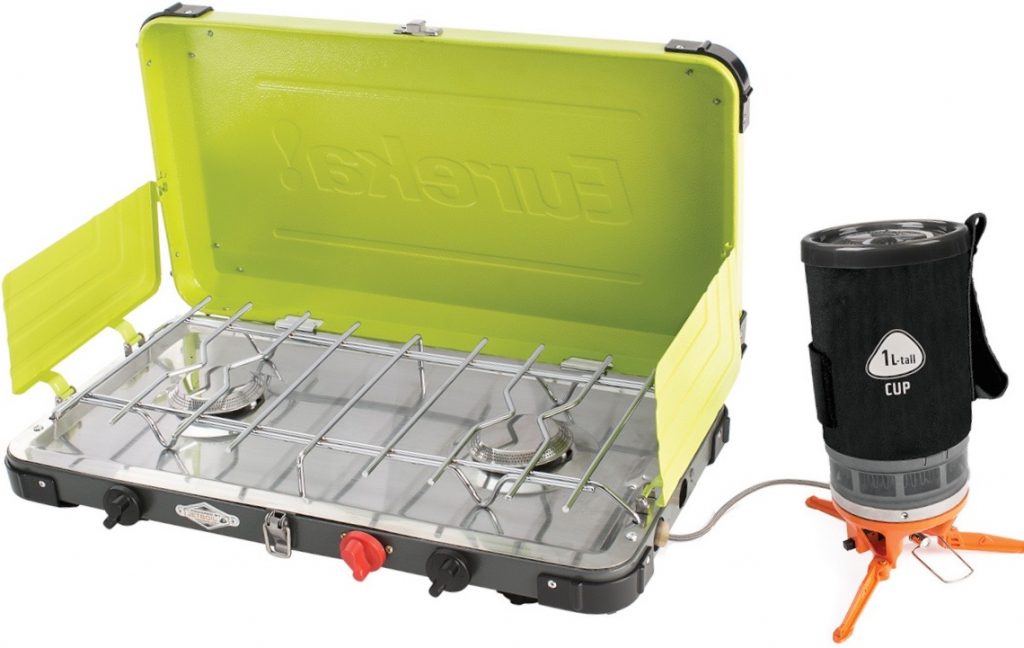
Eureka Spire LX and Luna Satellite Burner.
While I am impressed by the apparent quality as well as the reviews (and also really like the yellow-green color), this stove seems a little too large to be optimal for my current needs. I’m thinking I may end up sending it back, though I would be rather sorry to have to do so.
The Eureka Spire LX has a slightly smaller sibling, the Eureka Spire. It is an orange-red color and lacks a feature that supposedly makes the Eureka Spire LX particularly good at simmering food.
The Eureka Spire LX is about 22 x 13 x 4″ and 12 pounds. When the windscreens are up, it can accommodate a 10″ and 12″ pot.
The Eureka Spire is about 19 x 13 x 4″ and 11 pounds when folded for storage. When the windscreens are up, it can accommodate an 8″ and a 10″ pot.
Therefore, it seems to me that these stoves are not that much different in size from one another, or from most other two-burner stoves. The only one out there that I have been able to find that is appreciably smaller is the Jetboil Genesis.
Both of the Eureka stoves link to other propane stoves made by Eureka or Jetboil, including the Jetboil Genesis, so that they can all run on one propane source.
There also is a Eureka Luna Satellite Burner available for about $60 that can be linked to one of the Eureka Spire stoves (or to a Jetboil Genesis or Jetboil HalfGen) so that water can be boiled in a Jetboil backpacking cup without the use of an additional fuel source.
The Stansport Outfitter Series Stove. Image Credit: Outdoor Gear Lab.
Operationally, the main complaint that people seem to have about the Eureka Spire stoves is that the instant start mechanism is not very reliable. Coleman stoves seem to have the same problem.
I’ve never found needing to use a long lighter to light a camp stove to be a big deal though.
The Stansport Outfitter Series 2-Burner Stove recently was named as the best camping stove by an organization called Outdoor Gear Lab and thus might be worth a look.
It is a slightly larger stove with two 25,000 burners plus the supposed ability to simmer very well.
A few other well-regarded and popular camping stoves also are made by Coleman as well as by a company called Camp Chef.
For instance, the Camp Chef Everest High Output Stove features two 20,000 BTU burners.
In the comparison test that I saw online, the Everest was not able to boil a gallon of water nearly as quickly as was the Jetboil Genesis + 5 liter Flux pot, but it did do so more quickly than another high-BTU stove being demonstrated (the Coleman Gladiator FireKnight).
The Camp Chef Everest gets good reviews and is pretty moderately priced. The main downside seems to be that getting those high-powered burners to cook at low or even moderate heat is a real uphill battle.
The Camp Chef Everest.
The Coleman Classic Propane Stove may be the best choice for those who want a two-burner stove but are on a tight budget. Although the official price is $80, it’s often available for less than $50 on Amazon or elsewhere on the Internet.
It is a workhorse of a stove with many positive reviews, with the main downside for my purposes being that it is even larger than the Eureka LX.
In addition, many users complain that they have a difficult time adjusting the controls on this stove (as well as to perhaps a lesser extent the controls on other Coleman stoves) to a low or medium flame.
The first review on the Amazon page – written by SolMan636 – provides a possible way to hack this problem, however.
In addition, for those cooking with cast iron, I don’t think that burning as a result of the heat being too high is going to be as much of a problem.
If burning becomes an issue with other pans, then a solution could be to put those pans on a flame diffuser.
For instance, a standalone cast iron heat diffuser is not too large and could do double-duty as a trivet.
The Coleman Classic Propane Stove.
I also think that the Lodge Cast Iron Grill and Griddle – which I suggest bringing along for cooking purposes anyway – should work as a flame diffuser.
The Coleman Triton Series of stoves is similar to the Classic series, except the burners are higher output (11,000 BTU’s each) and the cost is a little higher.
Two-Burner Camp Stoves:
Coleman Classic Propane Stove. $80.
Coleman Triton Series Stove. $85.
Stansport Outfitter Series Stove. $91.
Coleman Fold N Go Stove. $100.
Camp Chef Everest High Output Stove. $121.
Jetboil Genesis Basecamp System Stove. $350.
Accessories:
Highrock Camping Stove Windscreen. $10.
Frigidaire Burner Grate. $12 each.
Ilsa 7-Inch Cast Iron Heat Diffuser. $23.
Eureka Luna Satellite Burner. $60.
Additional Information:
Outdoor Gear Lab – Choosing the Best Camping Stove
Outdoor Gear Lab – Camping Stoves
The Wirecutter – Car Camping Stoves
Teton Gravity Research – Jetboil Genesis Basecamp
Backcountry Edge – Jetboil Genesis
Backcountry Edge – Eureka Spire LX
Backcountry Edge – Eureka Spire
Backcountry Edge – Eureka Luna Satellite Burner
Scoutmaster Danny – Jetboil Genesis, Camp Chef Everest, Coleman Gladiator
Outdoor Gear Lab – Stansport Outfitter Series

The Snow Peak Baja Burner.
ONE-BURNER CAMP STOVES
Especially on trips that are focused more on traveling around than remaining at a campsite, and when I am on my own, and when I expect to have electric power that can be used for cooking at least some of the time, dragging around a large camp stove seems like it may be overkill.
I therefore have been mulling over the idea that sometimes for me, a one-burner outdoor stove might make sense.
One option that I am considering is the Jetboil HalfGen Basecamp System.
This is a single-burner propane backpacking stove that stores with a frypan lid and a soft carrying case. A windscreen also is included.
Like the Jetboil Genesis, the HalfGen works in tandem with the Jetboil 5L Flux Pot & Lid to boil water very fast.
However, the Flux pot must be purchased separately (retail price $90) since the HalfGen stove comes only with the frypan.
The HalfGen is much more compact than most other single-burner propane stoves but also considerably more expensive (e.g. even at a discount recently it was still $126).

The Jetboil HalfGen Basecamp System.
I had a chance to see the HalfGen in person and am feeling quite drawn toward the idea of purchasing it. It is really tiny but seems very solidly made.
I haven’t found many reviews of this stove and so am not sure if the quality control problems that seem to have plagued the two-burner Genesis stove extend to this little brother version.
I really like the idea of using it because of how small and compact it is though.
Jetboil is a sibling company to Eureka, and all of the propane stoves from both companies link together to run off of one propane source through what they call a “Jetlink.”
This could be an advantage of using this stove in connection either with the Eureka Gonzo Grill (discussed below) or with one of the Eureka Spire stoves, I think.
A popular stove choice for those people who are particularly limited in space but want a propane stove is the Coleman Bottle Top Propane Stove.
It consists of a small metal plate stove that screws on the top of a small bottle of propane fuel. This means that it takes up virtually no extra storage space (beyond the storage of the bottle of fuel).
The Texsport Single Burner Propane Steve is another alternative for this kind of stove.

A Coleman Bottle Top Stove being used to heat a dish of food.
Although it seems that these two choices are fairly safe if care is taken with them, I still feel a little uncomfortable with stoves where the food is perched high up in the air above a bottle of fuel, however.
Although the Coleman Powerpack Propane Stove takes up a good bit more storage space, I feel better about it because the food is sitting down at table level.
The Coleman Powerpack is a simple one- burner stove that is pretty reasonably priced but does not come with a carrying case. Many people seem to be storing it in its original cardboard box.
Another highly rated one-burner propane stove is the Gas One Dual Fuel Stove. Although it is a little more expensive than some one-burner stoves, the burner is a high-output one (15,000 BTU’s) and it comes with its own plastic carrying case.
The Camp Chef One-Burner Multi-Fuel Stove, which also includes a hard carrying case, is a similar stove.
Although these last two stoves use butane as well as propane, and although other single-burner butane stoves are widely available, the scattered stories that I have heard about people getting hurt or killed as a result of the butane tanks exploding make me very nervous.
Propane stoves have dangers too, but those seem to be just with their either catching fire or leaking gas – problems that seem to me fairly manageable as long as the stoves are only used outdoors.
For those living in California, buying butane appears to be rather difficult due to the government’s efforts to limit its availability to those using it for the purposes of making hashish oil. Butane also is more expensive than propane as a fuel source.
Based on what I have read so far, if I were going to buy a butane stove, it would be a more expensive one made in Japan by Iwatani.
The stove has 15,000 BTU’s and comes with its own carrying case. Like certain other butane stoves, it is used in many restaurants and homes in Japan for at-table cooking.

The Coleman Powerpack Propane Stove.
According to the Amazon description, the Iwatani stove has an “automatic safety stop – advanced regulator design shuts off the flow of butane which extinguishes the flame if the pressure in the canister rises to unsafe levels” and also is “CSA Commercial Indoor Approved” by the Canadian Standards Association (an organization said to be accredited by the American National Standards Institute).
I still would be hesitant to use this stove indoors, especially in my van, however.
I guess conceivably I might be tempted to use this stove – or the Genesis HalfGen – occasionally inside my van to boil water, since that would just take a couple of minutes and would not create the potential for food odors or mess.
I still think it would almost always be better to heat water outdoors, unless maybe I was stealth camping or the weather was outrageously bad, though.
If I did ever use use a stove inside a van or other RV, I would run the vent fan at a high level and also would have a fire extinguisher at hand, to decrease the safety risk. And I would make sure that there was plenty of open space on all sides of the burner, of course.
But I really doubt I will be operating a fuel-based camp stove indoors at all.

The Iwatani Portable Butane Stove.
Finally, the Japanese company Snow Peak is offering an intriguing new one-burner stove called the Baja Burner, which runs on containers of Snow Peak backpacking fuel.
This stove is incorporated into a little table with legs that unfold when the stove is to be used and then fold back up for storage.
The dimensions when folded up are small (14″ x 10″ x 2″), and the weight is about 6 pounds. It’s pretty pricey ($180).
A version of the stove was sold in the U.S. a few years ago but disappeared for a time. I haven’t found a lot of reports about this new version, but people seem to be liking it so far.
One-Burner Camp Stoves:
Texsport Single Burner Propane Stove. $30.
Coleman Bottle Top Propane Stove. $40.
Camp Chef One-Burner Multi-Fuel Stove. $40.
Coleman Powerpack Propane Stove. $40.
Gas One Dual Fuel 15,000 BTU Gas Stove. $60.
Iwatani 35FW Portable Butane Stove. $80.
Snow Peak Baja Single Burner Stove. $180.
Jetboil HalfGen Basecamp System. $180.
Accessories:
Jetboil Jetlink Accessory Propane Hose. $40.
Jetboil 5L Flux Cooking Pot. $90.
Additional Information:
Cheap RV Living – Gas One Dual Fuel Stove
The Eureka Gonzo Grill.
GRILL STOVES
I really like grilled food, especially when camping. I therefore would like to have access to a camp grill again, provided that I can find one that does not have a toxic grill plate and that is not too large for my vehicle.
Unfortunately for me though, the grill plates in most camping grills are made from really toxic materials (such as the aluminum in the Coleman Grill Stove that I used to own).
I therefore am really interested in the Eureka Gonzo Grill, which has a grill plate (reversing to a small griddle) made of cast iron.
It also has an integrated burner plate and so can be used as a single-burner stove. Unlike many grill stoves, it includes a full domed lid, which in my opinion can lead to better grilling results.
The Gonzo Grill is pretty large and so would be a commitment in terms of the amount of space that it would take up in my van.
It also has a fairly small cooking surface with regard to the griddle. While supposedly four hamburgers can fit on the grill, the griddle seemed to be capable of accommodating only one pancake at a time in the video on the Eureka website, for instance.
The Gonzo Grill was introduced less than a year ago and does not seem to be discounted very heavily at present. It’s expensive ($190) and I am very hesitant to spend that much money since there are not very many reviews out there yet.
The reviews out there that do exist are really good though, and Eureka’s reputation with regard to their regular stoves is also pretty good.
Oddly, there does not seem to be any sort of storage case or bag available for this grill. I suppose if I were to purchase it, I would make sure it was totally cool and then would store it in a plastic bin.
The Coleman Fold N Go Grill.
A similar but somewhat more compact alternative to the Gonzo Grill is the Coleman Fold N Go Portable Grill.
It converts to a single-burner stove with the purchase of the Coleman Fold N Go Stove Grate.
The Coleman grill comes in two different models (instant start and manual start), and the griddle and burner attachments are sold separately.
At regular prices, the instant start model plus both attachments is about $165, which is not that much less expensive than the Gonzo Grill. The Coleman grill setup is much more widely available at discounted pricing though.
The grill plate is reported by customers to be and looks like steel with a black ceramic coating (though I have not been able to find confirmation from Coleman on that).
The optional griddle attachment is stated as being made of aluminum.
The main advantage (other than price) that the Coleman grill seems to have over the Gonzo Grill is in its size and weight.
The Coleman Fold N Go is stated as being 14″ x 16″ x 5″ and 10 pounds (not including the lightweight aluminum griddle).
The Gonzo Grill is about 14″ x 13″ x 11″ and 14 pounds.
A final grilling option that I have been considering is the Coleman FyreSargeant 3-in-1 HyperFlame Stove.
This is a classic two-burner stove in which either one or both burners can be easily converted into a grilling surface through the use of the included “Swaptop” black steel grates.
(What is in the coating of the steel, I’m not sure.)
The FyreSargeant has two 11,000 BTU burners. Coleman says that the stove includes its “HyperFlame” technology, which “provides an even heat distribution across the pan and better wind resistance to cut boiling time in half when compared to a standard burner.”
Each of the burners has a “Windblock” shield so that fold-down side panels are not necessary – thereby providing the potential for two large pots of water to be heated up at once.
(The same stove is also available without the grill component under the name FyreCadet. Coleman also makes similar models with 12,000 BTU burners, called the Gladiator FyreChampion and Gladiator FyreKnight.)
The Coleman FyreSergeant 3-in-1 Stove.
One issue that I have heard several times is that this type of Coleman stove often makes an annoying loud screeching noise when it is first turned on. I would have to consider that to be a defect and send it back if that happened to me.
Another problem that a really high percentage of people report about this type of Coleman stove is that everything they cook on it gets burned, due to the usual Coleman problem of lack of burner regulation being exacerbated by the high BTU’s and by the wind protection.
Still, the FyreSergeant sounds like it conceivably could be a good all-around grill stove – similar to but better than the Coleman Grill Stove that I used to use – if the hack for Coleman temperature control knobs proposed by SolMan636 in the Amazon review for the Coleman Classic stove actually worked.
(And also if it didn’t screech, of course.)
However, if I were going to purchase a grill for camping purposes, it probably would be the Eureka Gonzo Grill. That cast iron grill plate is very appealing and it sounds like a good stove all around.
Especially if I had more storage space (such as if I were to buy a gear trailer), and if money were no object, I am thinking that it might be ideal to have the Jetboil HalfGen available for casual cooking and heating water, and then to JetLink that stove to the Gonzo Grill in order to cook full meals.
It seems to me that those two stoves working in tandem with one another might give me a nice little setup with the sort of cooking flexibility that I was trying to achieve with the Coleman Grill Stove, except with cooking surfaces that I would feel good about using.
Grill Stoves:
Coleman Fold N Go Portable Grill. $90.
Coleman Fold N Go Instastart Portable Grill. $100.
Coleman FyreSergeant 3-in-1 HyperFlame Stove. $180.
Accessories:
Coleman Fold N Go Stove Grate. $25.
The Jetboil Flash.
BACKPACKING STOVES
For a long time, I didn’t focus any attention at all on backpacking stoves, because I wasn’t planning to go backpacking.
Recently, though, I have been looking at the best ways to boil water on the road and am wondering whether the Jetboil is worth considering.
The Jetboil Flash is a backpacking stove that is incorporated into a 1-liter cup. Its only function is to boil about two cups of water so that backpackers can rehydrate their food, and it does that super-fast (e.g. in around 2 minutes). It runs on small canisters of backpacking fuel (a propane/butane mix), which store neatly inside the cup when the stove is not in use.
Those who would like to heat a larger quantity of water at once (i.e. a little more than a quart) may consider the Jetboil Sumo with its 1.8 liter cup. It also provides the ability to simmer food at a lower heat level, rather than only going at full-blast as the Flash does. (Other Jetboil models with smaller cups also provide simmering capabilities.)
The Jetboil backpacking stoves are extremely popular and, from what I have found, seem to get really good reviews across the board.
Quite a few mold avoiders have reported using them, especially for heating up water to make coffee or tea when on the road.
The Jetboil Sumo.
(The Jetboil also sells popular coffee press attachments for use inside the unit cups. The Regular coffee press fits the Jetboil Flash, while the Grande coffee press fits the Jetboil Sumo and other wider cups.)
Although I have seen a few reports of other backpacking stoves exploding, I was not able to find any evidence that this has happened with a Jetboil stove. I think that possibly it could be that the way that the Jetboil is designed allows the stove to get enough air circulation to prevent overheating.
The main problem that I see with these Jetboil stoves is that the cups are made of anodized aluminum.
The similar MSR Reactor, MSR Windburner and Primus Eta Lite stoves also use anodized aluminum for their cups. (A product called the Jetboil Sol Ti used a titanium cup, but that was discontinued a number of years ago and does not seem to be available at all now.)
Supposedly, “anodizing” the aluminum creates a hard surface that prevents particles of metal from contaminating food or drink cooked in the aluminum pots. Still, many people – especially those with chronic illness – express concerns about this material and avoid using it.
I used to use Calphalon pots and pans (which also are made from anodized aluminum) but got rid of all of them more than a decade ago because of my own health concerns, for instance.
It very well may be that just heating water in a pot like this is safer than cooking or making coffee in it, but this does not seem to be a topic that has been studied very much and there are a lot of questions associated with it.
I do like the idea of the Jetboil Sumo because it often would be very convenient to be able to heat up a quart of water without having to drag out a large stove as well as a separate pot. This little stove would set up and boil water easily and quickly, and then stow away really compactly.
I am actually thinking that it might even be worth it to buy the Jetboil Sumo just to get hot water super-easily to be able to – for instance – take a sponge bath and fill a water bottle late at night, even if I didn’t ever ingest the water.
The Stanley Adventure Camp Cook Set being used on a backpacking stove.
But if I also could use the hot water to be able to prepare a coffee enema or fill a thermos with tea, that would be much better.
I also like the fact that the flame is protected inside the cup, since this makes it more able to work even in windy or rainy conditions and also seems to reduce the fire hazard.
Although it states in the instructions that the Jetboil is not to be used indoors due to the risk of carbon monoxide poisoning, I think that if I ever were going to use a non-electric stove inside my van to boil water, this actually might be the safest one since the flame is enclosed in the cup and since the heating time is so fast.
Of course, if I did ever use it indoors, I would be very careful to take proper precautions (i.e. have vent fan running and window open, place it on my metal table with large clearances on all sides, have a fire extinguisher at hand).
And really, because it boils water so quickly and in all kinds of weather conditions, I don’t think there would be much reason to have to use it inside anyway.
Of course, it also would be possible to obtain a few cups of hot water by taking a one-quart stainless-steel cup – such as the one from the Stanley Adventure Cook + Brew set – and putting it on top of a regular backpacking stove.
But the Jetboil Sumo seems a lot better to me – capable of heating a larger amount of water much more quickly and also apparently more safely since there is not an open flame.
The “cozy” neoprene coverings on the Jetboil cups also are appealing since they would allow me to hold the cup easily without the need for a potholder. I have yet to find anything like that for the Stanley cups.
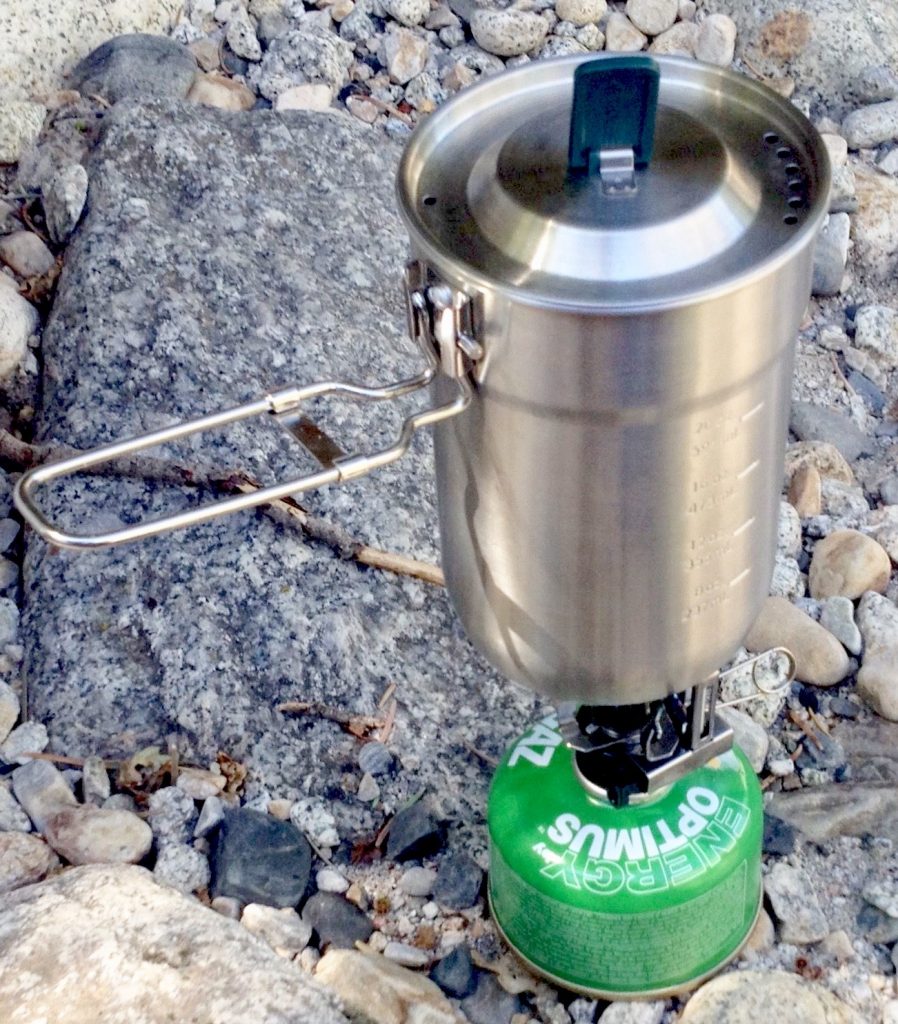
If I do decide to try the Stanley cup method of boiling water, then I will need to buy a little backpacking stove for use on top of a can of fuel.
One possibility is the MSR PocketRocket2, which seems to come up frequently and to be well-regarded.
The Etekcity Backpacking Stove.
The Snow Peak Giga Power Stove also is moderately priced and seems to get pretty consistently good reviews.
The Jetboil MightyMo is a backpacking stove with reviews that sound similar to those of the Jetboil Genesis – fantastic when it works, but prone to occasional breakage issues. That would be much less of a problem if it were just being used as an auxiliary stove for car camping rather than as the only stove brought along on a long backpacking trip though.
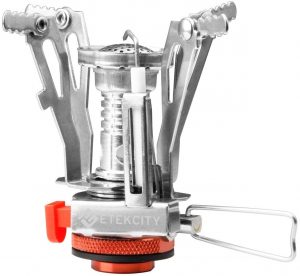
A super-inexpensive backpacking stove (less than $13) that also gets very good reviews on Amazon is the Etekcity Ultralight Portable Camping Stove. Maybe that would be a good one to use to start out, just as an experiment.
Backpacking Stoves:
Etekcity Ultralight Portable Backpacking Stove. $13.
Snow Peak Giga Power Stove. $40.
MSR PocketRocket2 Backpacking Stove. $45.
Jetboil MightyMo Backpacking Stove. $50.
Jetboil Flash Boil-Only System (1 liter). $100.
Jetboil Sumo Cooking System (1.8 liters). $140.
Accessories:
Jetboil Coffee Press, Standard. $10.
Jetboil Coffee Press, Grande. $13.
Additional Information:
Clever Hiker – Backpacking Stoves
Backcountry Edge – MightyMo Backpacking Stove
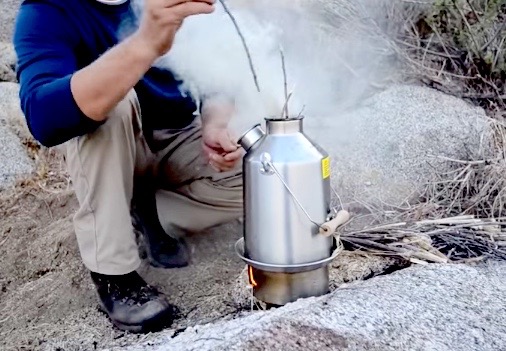
The Kelly Kettle Base Camp.
WOOD STOVES
Usually when car camping in locations where campfires are allowed, a fire pit with a grill is provided.
For those who are camping off-grid and want to grill on a campfire, a camp grill of some kind will need to be brought along.
Personally, I fairly rarely have built campfires even when camping with other people and have tried cooking on the fires that I have built only a couple of times.
Fires are often prohibited or frowned upon in desert locations, and I also have never been very motivated either to devote room in the car to carrying wood from elsewhere or to chop my own wood. Therefore, unless wood is sold on-site, I usually just skip the campfire entirely.
I also used to be reactive to campfire smoke, but that went away pretty soon after starting mold avoidance.
Despite the fact that I rarely have done much cooking over campfires, I do feel that (for those who can tolerate the smoke) the idea of grilling over wood has a certain primal appeal, especially when camping.
And that made me start thinking about wood-burning backpacking stoves.
There are quite a few of these little stoves around now, with some pretty expensive ones made by companies such as Ohuhu, Solo and Toaks. But I don’t see those companies offering grills to allow people to barbecue with their wood-burning stoves.
In addition, there are about a billion “bushcraft stoves” or “hobo stoves” now being sold, and some of them do have the ability to grill foods. I’m not interested in being quite so minimalist though.
Fairly new on the market is the Biolite 2 Camp Stove. This is a wood-burning stove that offers the ability to either grill or to cook in a cup – and that also slowly recharges a cell phone.
Like other wood-burning backpacking stoves, the Biolite runs off of twigs, pine cones and other small pieces of gathered wood. Commercial wood pellets also can be used.

The Biolite 2 Camp Stove.
Although I would like to be able to charge my cell phone while camping in the wilderness, I am not convinced that the Biolite stove is going to be a good way to do it.
Reports suggest that I would have to spend a really large amount of time gathering wood and feeding it into the stove to get any significant amount of power.
However, the reports about the stove component do seem pretty positive, at least insofar as dry material to use in the stove can be obtained.
I also am very happy about the fact that the cup for the unit is stainless steel rather than aluminum or some other toxic metal.
I’ve thought to some extent about buying the Biolite stove, especially when I came across the original model available at a heavily discounted price.
However, some reports seem to suggest that the stainless steel grill part of system is not particularly well made, and that has made me wonder if it would really be the right product to meet my needs.
If the grill were instead made of cast iron, which seems to me more appropriate for grilling over wood, I would be much more willing to take a chance on it.
In my quest to find efficient ways to boil large quantities of water though, I did find one more wood-burning stove that I am now pretty interested in – the Kelly Kettle.
The Kelly Kettle was developed in the 1890’s in Ireland, and the descendants of the original developer head up this company.
The kettle consists of two basic pieces – a small dish stove that is low to the ground, and then a tall water kettle with a tunnel in the middle from top to bottom which is placed inside the dish.
The design of the stove gives the fire lots of ventilation from both the top and the side, so that flames can rise up through the hole like a volcano and heat the surrounding water.
It is claimed that the water in the kettle reaches boiling in 3-5 minutes, which is approximately as fast as a Jetboil could heat the same amount of water.
Accessories allow the Kelly Kettle to cook food either as a stove or as a grill, as well as heating water.

The Kelly Kettle Trekker. Image Credit: Best Mountain Artists.
The Kelly Kettle is available in three sizes – Trekker (heats 20 ounces of water), Scout (41 ounces) and Base Camp (54 ounces).
The weight of the heaviest model is only 2 1/2 pounds. Options of stainless steel and aluminum are available for each.
Although this kettle stove would take up some room in my van, I am thinking that it might be worth it.
I especially like the idea that the kettle stove thrives on windy conditions that easily defeat other camp stoves (since the wind just gives the fire more air circulation rather than blowing it out).
In any case, although this stove is not as well-known as the Biolite, it seems that virtually everyone who has tried the Kelly Kettle is really enthusiastic about it. So I would be interested in trying it.
Of course, in the end, probably gathering wood to feed this stove – or even just feeding it packaged wood pellets – is not something that I am going to be inclined to do on a daily basis unless I absolutely have no other options.
I do really like the idea of it though.
Campfire Grills:
Coughlan’s Standard Camp Grill (Stainless Steel). $14.
Coughlan’s Heavy Duty Camp Grill (Cast Iron). $28.
Wood Stoves:
Kelly Kettle, Stainless Steel. $80-90.
Kelly Kettle Basic Kit, Stainless Steel. $103-115.
BioLite Camp Stove 2 Bundle. $200.
Accessories:
Coffee Press Attachment for BioLite Camp Stove. $15.
Additional Information:
Hiking Reviewed – Wood-Burning Backpacking Stoves
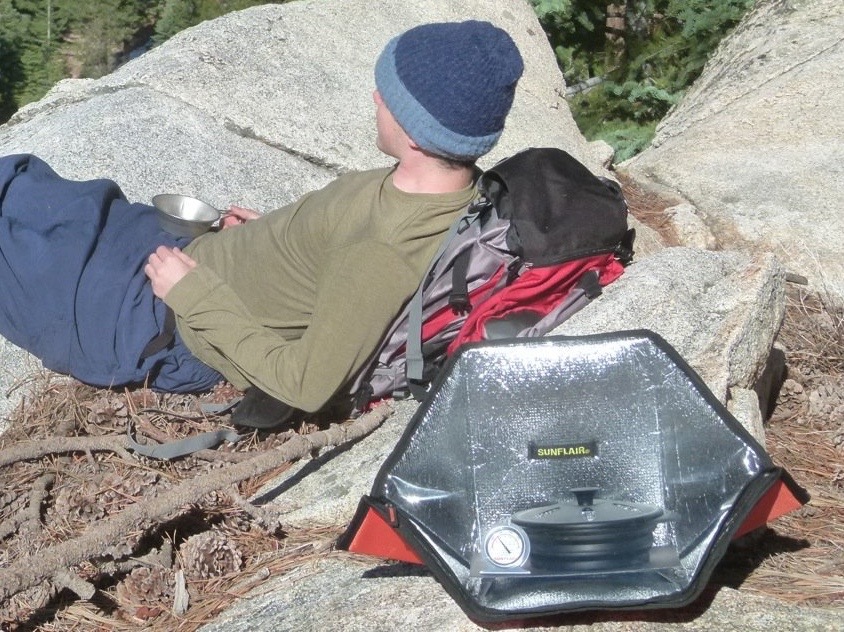
The Sunflair Mini Portable Solar Oven.
CAMP OVENS
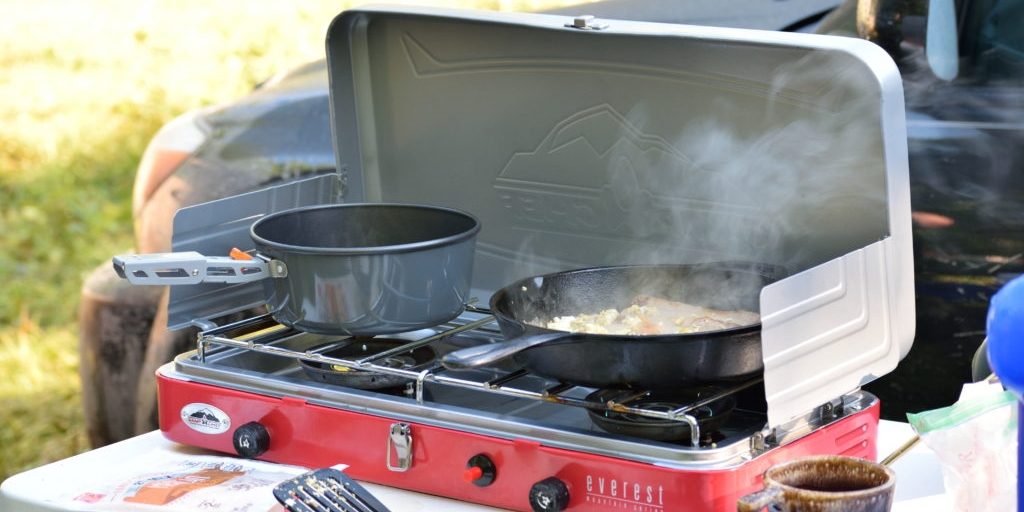
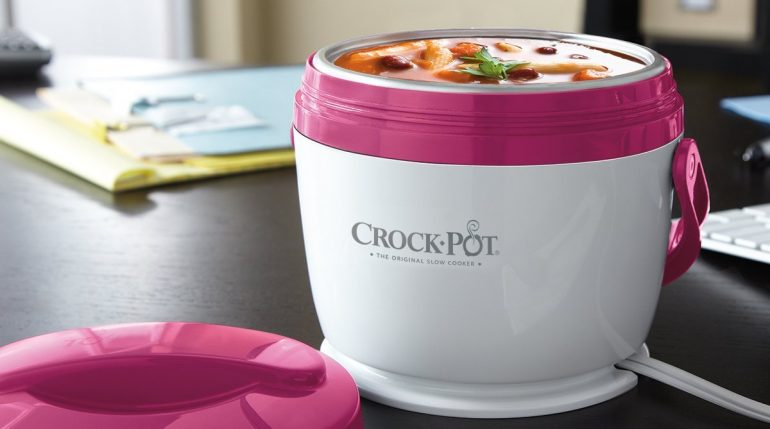
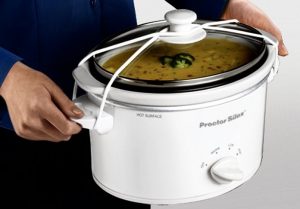
The Casita trailer that I lived in for several years had a two-burner propane stove but no oven. I did miss not being able to do any baking at all, and really wish that I had discovered the Coleman Camp Oven during that time.
The Coleman Camp Oven (pictured at the top of this page) consists of a metal box that sits on top of the camp stove and then folds flat for storage. It was designed in the 1950’s.
The Coleman oven gets rave reviews from many people, and the more that I look into it, the more that I understand why.
Sometime soon, I will make it a point to get my hands on one and try it out.
One negative thing that I have heard about the oven, though, is that the heat can be a bit intense at the bottom of the oven.

The Camp Chef Camp Oven.
Some people use pizza tiles to try to diffuse that heat.
I also think that using cast iron pans in the oven would help to prevent burning.
The Camp Chef Outdoor Camp Oven is a freestanding oven with a two-burner camp stove on top, running on a small propane tank.
The burners are 7500 BTU’s each, and the oven gets up to 400F.
A standard 9×13″ baking pan will fit into the oven.
I have not yet used a solar oven, but now that there is a small one that is made by a reputable company – Sunflair – and that gets good reviews, and that is available for less than $100, I am really interested in trying it!
Ovens:
Sunflair Mini Portable Solar Oven. $85.
Camp Chef Outdoor Camp Oven. $230.
Accessories:
Mr. Pizza Pizza Stone Tiles. $20.
Additional Information:
Cheap RV Living – Coleman Oven

A hot meal cooked in the Road Pro. Photo Credit: Himpshaw.
CAR COOKING
A new category of cooking devices that I have yet to try are ones that use small amounts of energy generated by the car engine to gradually heat or cook food during long car trips.
These kinds of devices first became popular among long-distance truck drivers, but a few mold avoiders have started using them as well.
Especially when I have driven long distances across the country, I might have really benefited from a cooking appliance like that since it would have prevented me from having to take the time to prepare a meal or to find an acceptable restaurant when I got hungry.
Also, a fair number of mold avoiders do not have any cooking facilities at all. For instance, some of these individuals say that they are not yet set up to use solar power for cooking; cannot tolerate wood smoke, propane or other canister fuels; and often are unable to find RV parks without unacceptable sewer toxicity issues.
For them, being able to prepare a hot and healthful meal using electric power generated by the car could be a welcome concept.

A 2-Quart Crock-Pot Model (100W) with potential for use on the road.
Despite the advantages that I am seeing with this idea, it also seems important to realize that as various cooking methods go, this seems to be a pretty inefficient one.
Insofar as people can tolerate propane or other camp stove fuels, and also insofar as weather permits it, a wide variety of foods can be cooked or heated up outdoors in just a couple of minutes during stops on long journeys.
This could be done at a picnic table in a rest stop or city park, for instance.
Another possibility is to quickly heat up or cook some food in a small Instant Pot, using electricity available in a public place such as an outdoor cafe.
I would tend to think that if the Instant Pot is kept inside a tote bag, other people likely will assume that the item being charged is an electronic device and not give the matter much thought.
Gas stations or convenience stores also might be willing to allow customers to use their electricity for a short period of time, if a purchase is being made and if they are asked politely.
Compared to these two methods of food preparation, cooking in the car is much more inefficient as well as more limited in terms of the types of dishes that can be easily produced.
Still, being able to plug a cooking device filled with some raw ingredients into the cigarette lighter of a car at the beginning of a trip and having it turn into a hot meal that is ready to eat a few hours later is an interesting concept that has the potential of being helpful for more than a few mold avoiders.
I therefore have put some thought into the question of how this can best be accomplished for them.
LOW-WATTAGE FOOD WARMERS
A fair number of warming devices use very low wattage to slowly reheat pre-cooked food to the point that it can be enjoyably consumed.
Typically, these devices are designed so that people can plug them in at work at 9 a.m. and then have a warm lunch available at noon.
They also are marketed to long-distance truck drivers with the idea that food can be placed in the container and then will be ready after three or four hours of driving.
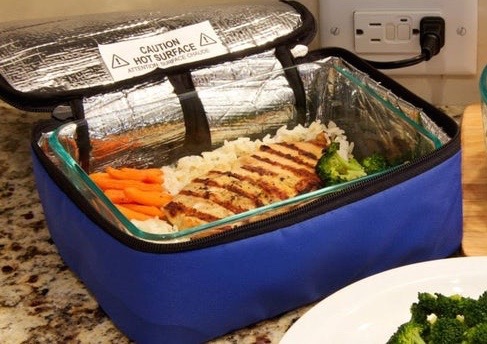
The Hot Logic Mini Portable Oven.
For instance, one popular device is the Hot Logic Mini Portable Oven.
This is a small heated box (45 watts) that uses regular electricity but that also can be powered through an inverter in the car to reheat foods while traveling.
Although the Hot Logic Mini often is used for heating frozen packaged entrees, the addition of a small Pyrex dish that fits inside allows it to be used to heat leftovers or other kinds of foods as well.
The temperature goes up to about 170F – that is, well below boiling.
The Hot Logic Family has a higher wattage (100 watts), but it also includes a much larger dish.
In terms of cooking temperature and time needed to cook a meal, the Hot Logic Family seems to be about the same as the Hot Logic Mini.
Based on what I have read, it seems that if a meal is just being reheated in the Hot Logic, then it might be ready in a couple of hours, but possibly might take longer.
If a meal is being cooked from scratch, or if it starts out frozen, then it seems best to expect that it is going to be a long time (such as 4-8 hours) before it is ready.
The Hot Logic thus seems most appropriate for people who are driving long distances and will be running the car for an extended enough time to power the Hot Logic until the food is cooked.
If someone is only driving for a shorter period of time, then the Hot Logic might not be sufficient to cook or even heat the food.
The Crock-Pot Food Warmer.
Another popular warming device is the Crock-Pot Lunch Crock Food Warmer.
This warmer is in the shape of a bowl and has 50 watts of power.
The insert for the bowl is made of stainless steel.
It is promoted pretty much solely as a way for people who are working in office buildings to heat soup or leftovers for lunch.
I haven’t seen any suggestions from the manufacturer that it be used to prepare meals from scratch or to heat up food in the car, for instance.
Like the Hot Logic, this item is very popular and seems to get very good reviews. The main deciding factor between the two products seems to be what exactly people would like to eat.
While both devices seem like they would work for, say, heating up leftover stew or a can of beans, soup is particularly well-suited to the Crock-Pot Food Warmer (and virtually impossible to prepare in the Hot Logic).
On the other hand, if the goal is to be able to cook a piece of chicken and some vegetables from scratch, probably the Hot Logic is going to do that much better due to the shallow nature of the dish.
Boxed frozen meals can be cooked in the Hot Logic but not the Crock-Pot, of course.
Hot Logic Mini & Accessories:
Hot Logic Mini Portable Oven, 45W. $40.
Pyrex 6-Cup Rectangular Storage Dish. $10.
Hot Logic Family & Accessories:
Hot Logic Family Portable Oven, 100W. $60.
Pyrex Basics 3-Quart Oblong Baking Dish. $20.
Crock-Pot Food Warmer:
Crock-Pot 20-Ounce Lunch Crock Food Warmer, 50W. $25.
Additional Information:
Hot Logic – Hot Logic vs. Road Pro
HIGHER-WATTAGE FOOD WARMERS
Another portable oven that is often used by truckers as well as some van dwellers is the Road Pro Portable Stove.
The oven is intended for use in the car and comes with a cigarette lighter attachment so that an inverter is not needed.
This oven is different than the Hot Logic or Crock-Pot warmers in that it uses a larger amount of maximum power (12 amps, which is equivalent to 144 watts) and gets up to about 300 degrees.

The Road Pro Portable Oven.
The Road Pro therefore cooks meals much faster than the Hot Logic does.
Based on the reports I have read, it sounds like the Road Pro will reheat a meal in maybe 15-30 minutes and cook a meal from scratch in maybe an hour or so.
The Road Pro does not have any temperature adjustment on it, and the heating is said to not be very even.
Reports suggest that if the food sits in it for much longer than the necessary cooking time, it often will get dried up or burned.
I have read that putting a small amount of water in the bottom of the unit and then using a smaller pan than recommended to hold the food may help to address the burning problem.
In terms of the cooking container, the Road Pro is set up to accommodate small aluminum loaf pans without a lid.
Although some people do use the Road Pro to make healthy food from scratch, it more seems that the design of the unit is to heat up packaged foods.
The company pictures of the unit show it being used to heat up fast food wrapped in aluminum foil.
Of course, many mold avoiders (including me) avoid using aluminum foil or aluminum containers for cooking because of the toxicity risks.
I have found quite a few other loaf pans – including several stainless steel pans, a Pyrex dish, a ceramic non-stick pan and three ceramic terrine pans – that appear that they should fit into the Road Pro though.
A terrine pan from Arousing Appetites with potential for use in the Road Pro.
With regard the potential heavy metal contamination of the ceramic terrine pans, Emile Henry (made in France) and Arousing Appetites (made in Virginia) make statements suggesting that their products are free of heavy metal issues on their websites.
Although Le Creuset ceramics are made in China, and although I do not see a mention of heavy metals on their website, I have more than once seen test results suggesting that while the brightly colored exteriors may be high in heavy metals, the cream colored interiors have very low levels.
Note that of the possible liner replacements that I have listed, only the aluminum pans and the Norpro stainless steel pan have been confirmed by customers as working with the Road Pro.
The other pans seem like they should should work based on their measurements, but I am not guaranteeing that they actually will. If anyone tries these pans with the Road Pro and they do not work, please let me know so that I can adjust the list.
Regardless of what type of pan is used in the Road Pro, lining that pan with waxed paper would reduce both toxicity potential as well as cleanup time, I think.
Another option that I think could add functionality to the Road Pro is a large enameled steel butter dish (stated on the Amazon page as made in China but tested as negative for lead and cadmium) with a fitted beechwood top.
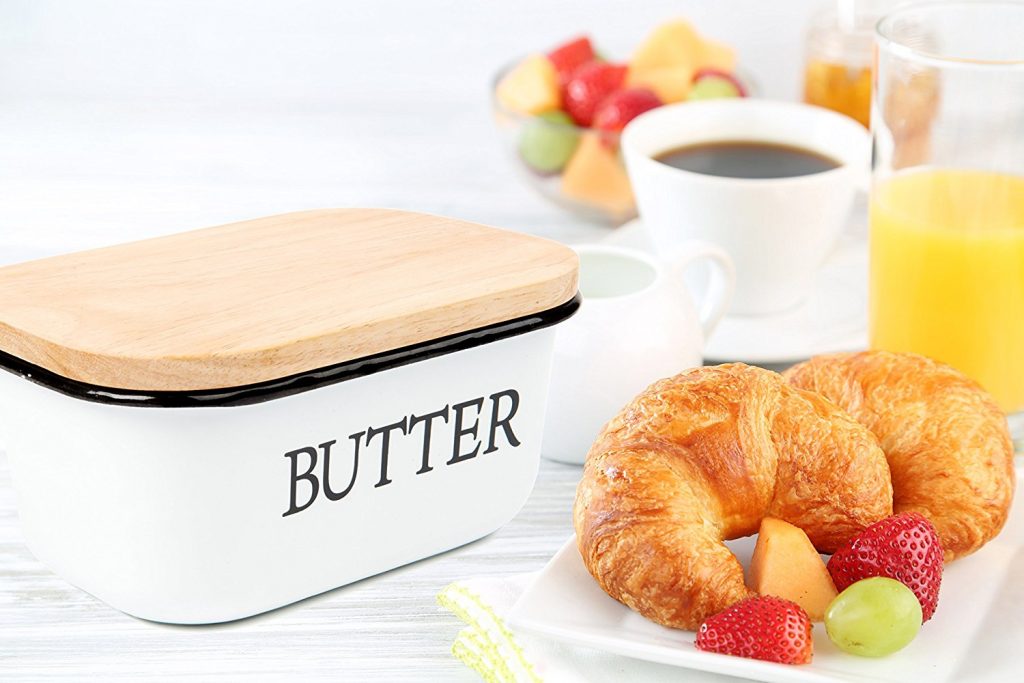
A butter dish that could be used for heating soup in the Road Pro.
The dish appears that it should fit into the Road Pro and is designed to hold three cups of butter.
It therefore seems that it could be used to heat up a nice serving of soup or stew in the unit.
(Probably I would tie the lid on with kitchen twine or some other attachment, to keep the lid from coming off in the case of a sudden stop or accident.)
Regardless of the pan option that I was using for the Road Pro, I probably would be inclined to add a little water to the bottom of the main pan, in order to create more of a steaming effect and to decrease the likelihood of burning.
An extremely similar product to the Road Pro is the Gideon Heated Electric Lunch Box.
I have not been able to find out much information about it (not even the wattage!), but it looks just like the Road Pro, uses the same size pans, seems to cook food in the same amount of time, and generates about the same level of user satisfaction.
I wonder if it is just the Road Pro being sold under a different name, or if it is a copycat product.
Higher Wattage Food Warmers:
Road Pro 12V Portable Stove, 12 Amp (144W). $36.
Gideon Heated Electric Lunch Box. $45.
Accessories:
DOBI Disposable Aluminum Foil Pans, 8.5×4.5×2.5 (30 Count). $11.
Happy Sales Stainless Steel Loaf Pan, 8.5×4.5×2.5″. $11.
Fox Run Stainless Steel Loaf Pan, 9.5×5.25×2.5″. $12.
Norpro Stainless Steel Bread Loaf Pan, 9.5×5.5×2.5″. $12.
Pyrex Basics 1.5 Qt. Loaf Dish, 9.6×5.8×3″. $12.
Green Life Ceramic Non-Stick Loaf Pan, 8.5 x 4.4 x 2.7″. $21.
Your Uncommon Essentials Butter Dish with Lid. 7x4x3″. $24.
Arousing Appetites Ceramic Bread and Meatloaf Pan, 9x5x3″. $38.
Emile Henry Ruffled Loaf Pan, 9x5x3″. $42.
Le Creuset Heritage Stoneware 1 1/2 Quart Loaf Pan, 9x5x3″. $50.
Additional Information:
Cheap RV Living – Cooking Suggestions
SMALL SLOW COOKERS
Another possible option for low-power cooking on the road is a regular small slow cooker.
Quite a few small slow cookers use only 100-150 watt power even when on high, and these seem to be much better suited to cooking real food than any of the food warmers mentioned above.
I’m a good enough cook that probably if I put some thought into it (and bought an add-on pot), I could figure out how to make some decent meals in either the Road Pro or the Hot Logic.
In the end though, I think that both of those appliances are really suited pretty much only to reheating things.
The Crock-Pot 2.5 Quart Mini Casserole with locking lid.
On the other hand, even small and inexpensive slow cookers are capable of making pretty good meals from scratch.
Just doing a quick search, I was easily able to find more than half a dozen well-reviewed small slow cookers with low wattages – each with three different heat settings (high, low and warm) and the ability to cook at least a full quart of food, and and each containing a stoneware crock that seemed unlikely to burn my food.
Moreover, all of these slow cookers are priced at considerably less than either the Hot Logic oven or the Road Pro oven.
Note that although Road Pro offers a 12 volt slow cooker unit, I am not seeing what benefits it is providing over all these other slow cookers except for the cigarette-lighter plug (which is not necessary with a 150-watt inverter).
Based on the Amazon reviews, I think that the other slow cookers that I have listed may be more well-made and reliable than the Road Pro slow cooker as well as less expensive.
Although I mostly have used slow cookers to prepare stews and soups from scratch, it occurs to me that they undoubtedly also would be fine at reheating things without making any sort of big mess.
For instance, I could add a couple of inches of water to the bottom of the pot, and then add a Pyrex dish filled with the soup or other food that I wanted to heat up – choosing the setting based on how soon I wanted to eat.
I also am very interested in the idea that the 2-quart VitaClay cooker makes yogurt in addition to slowly cooking food. It contains an unglazed earthenware crock that has gotten many positive reviews among people with an interest in natural health, and I would really like to try it.

The VitaClay Cooker
I also think the 2-quart VitaClay crock from this unit could be used inside my 6-quart Instant Pot at home, thereby allowing me to try making rice in a VitaClay pot without having to buy and then make room in my kitchen for an expensive full-sized VitaClay Multicooker.
One downside to using a slow cooker is that although all of these units have crocks that are said to have been tested and reported as low in lead and cadmium, the levels in most of these pots are still not non-existent.
Considering the long cooking times, this means that very small amounts of these metals conceivably could leach into the food and have a negative effect on people who already are sick with environmentally related illnesses.
The VitaClay possibly may be the safest with regard to lead and cadmium levels, which is one reason that I am especially interested in that particular cooker.
In addition, some of these units are reported to get pretty hot on the outside when they are working (especially when on the high setting), and using them in the car could result in spillage.
The Crock-Pot Mini Casserole has a locking lid, which at first seemed potentially helpful in guarding against spills. However, the product manual says not to use the locking lid while the unit is in use, because of the possibility that the glass will break.
While my guess is that this probably will not happen if the unit is running on the low temperature (which is what I would use with it in the car anyway), it seems better not to take the risk since the company does not sell replacement lids.
The Proctor Silex cooker with lid attached.
Therefore, regardless of what kind of slow cooker is used, just securely fastening the lid to the container with cord so that it is less likely to come off seems like the best option.
Although the two Proctor Silex “Portable” slow cookers have a cord attachment included for this purpose, some other kind of cord – such as bungee cord or clothesline – could be used to accomplish this goal for the other models of slow cookers.
In addition to securing the lid, I might place the slow cooker in a zippered insulated grocery bag to protect against spills and to maintain maximum heating ability with a minimum level of power.
I then might put the zippered bag inside a small plastic storage bin, to provide further protection to the unit.
I would place the bin somewhere in the car (such as the floor in front of the passenger’s seat) where it would be particularly secure in the event of a sudden stop or accident.
Small Slow Cookers:
Brentwood Appliances Slow Cooker, 115W, 1.5 Quart. $13.
Elite Gourmet Slow Cooker, 120W, 1.5 Quart. $14.
Crock-Pot Round Manual Slow Cooker, 100W, 2 Quart. $18.
Proctor Silex Portable Oval Slow Cooker, 100W, 1.5 Quart. $19.
Proctor Silex Portable Round Slow Cooker, 90W, 1.5 Quart. $20.
Nesco Oval Slow Cooker, 120W, 1.5 Quart. $22.
Crock-Pot Mini Casserole Slow Cooker, 140W, 2.5 Quart. $36.
VitaClay 2-in-1 Yogurt Maker and Slow Cooker, 120W, 2 Quarts. $40.
Road Pro 12V Slow Cooker, 8 Amp (96W), 1.5 Quart. $45.
Accessories:
Earthwise Insulated Reusable Grocery Bag (Set of 2). $21.
RUNNING OFF THE CAR BATTERY
Many people with apparent knowledge about car mechanics say that it is much better to run all 12 volt power from an auxiliary battery rather than from the cigarette lighter.
That seems like a good goal to work toward, therefore.
However, for people who would like to use one of these devices with their main car battery while traveling, here are some thoughts.
Although cars may vary on this, it seems that most cars have a 10-amp fuse in terms of the power delivered to the cigarette lighter and that this is on a different circuit than other electrical components such as the air conditioner and stereo system.
This means that, at most, the cigarette lighter likely can support a 120 watt item.
This perplexed me a bit, since the Road Pro is stated as being 144 watts and since I have not read any reports of people experiencing blown fuses as a result of using it.
However, I was told by a few individuals that while the Road Pro starts off using a higher level of power (about 132-144 watts), it quickly settles down to a lower level (around 100-110 watts).

A UK cab driver tries out the Road Pro. Photo Credit: Storm Cab.
This makes some sense to me, since some computers or other electronic devices also approach 100 watts and since I never have heard of anyone burning a fuse in their car as a result of charging a computer.
The good thing is that, to my understanding, if a fuse is burned out that will only affect the use of the cigarette lighter (rather than, say, making the whole car non-operational).
In addition, these fuses apparently are fairly easy and inexpensive to replace.
Of course, not all cars are the same and I am not an expert on this. Therefore, conceivably it may be a good idea to discuss this topic with a mechanic and possibly even to purchase a spare fuse and learn how to replace it, before using any devices with more than 50 watts or so in the car.
Still, it sounds to me like using a device that is 100 watts or less to heat food in the car should be doable.
In addition, it seems that 100 watts of power is sufficient to heat a portion of food in a reasonable length of time and that there is not really any need to use a higher wattage for that purpose.
Therefore, if I were going to use my car battery to heat food while driving, I likely would just choose the device that I found most appealing in terms of the types of meals that I wanted to prepare.

The Enkey 150-watt inverter.
Although a few of the slow cookers listed above have maximum wattage ratings of more than 100 watts, I would guess that they would be fine to use in the car too as long as only the Low or Warm settings were used.
(Those same slow cookers could be used on their high setting on other occasions when access to electric power from a regular outlet is available, of course.)
Another thing that I have read is that using an inverter that supplies a somewhat higher wattage than the wattage needed by the appliance being used is a good idea, because of inefficiencies that may occur.
The 150-watt inverter that I own seems about right for running 100-watt cookers, for instance.
Another issue is whether these devices have the potential of running down the car battery so that it cannot be used to start the car.
To my understanding, as long as the car is running, then the power will be coming from the alternator rather than from the battery.
I therefore suggest that these devices only be used when the car is running, rather than when the motor is off.
In addition, although supposedly inverters turn themselves off when the car is not running, I had one mishap where my battery went totally dead when my car was parked with the inverter plugged in for several days.
The mechanic that I consulted said that he did not believe that the inverter was responsible, but I still am wary about the possibility of this happening again.
I therefore have gotten in the habit of unplugging my inverter from the cigarette lighter any time I am not using it as well as any time I turn off the car, just to be on the safe side.
Inverters:
Enkey 150W Car Power Inverter. $17.
Foval 150W Power Inverter Car Charger. $17.
Soup made in an Instant Pot.
ELECTRIC COOKING
Whether I will end up with enough battery power to do much cooking with electric appliances when parked without hookups, I’m not sure. I more see my battery as a way to charge my computer and to power the vent fan, and occasionally to be able to use a heating pad to get warm at night, with cooking being more of a luxury.
However, since I imagine that I will be spending at least some of my time on most trips with access to electricity, either in campgrounds or hotels, bringing along a few well-chosen appliances to help with cooking could be worth considering.
MULTI COOKERS
I really wish that the Instant Pot Mini had been around when I was camping full-time. It allows cooking of a wide variety of foods quickly and easily, anywhere there is electricity (including at campsites and in hotel rooms).
Also, although I generally would be very hesitant to cook anything on a stove in the van for fear of food odors and splatter, the Instant Pot is so self-contained that I think that making an exception for it sometimes could be considered.
The Instant Pot is basically a combination of a pressure cooker, a rice cooker and a slow cooker. It also includes a saute function, which (in a pinch) could be used to cook a hamburger, steak or vegetable stir fry.
In addition, the Instant Pot Mini 7-in-1 Cooker includes a yogurt maker setting.
I have owned the Instant Pot 6-Quart 7-in-1 Cooker for about two years and use it almost every day. I mostly use it for stews, soups, broths, rice, oatmeal, hard-boiled eggs and yogurt, but a wide variety of other foods can be prepared in it as well.
In addition to the cooking flexibility, I like the fact that the Instant Pot includes a stainless steel inside pot. Regardless of how much testing is done, the ceramic crocks in slow cookers make me a bit nervous with regard to heavy metals that might be ending up in the food.
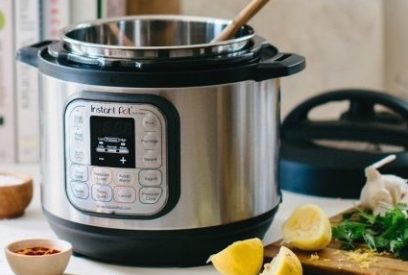
The Instant Pot Mini.
A downside of the Instant Pot is that even the 3-quart model is a little on the bulky side in terms of the amount of storage space it takes up.
However, the Instant Pot is so flexible that – at least for people who anticipate having access to electricity fairly regularly – I think it is well worth considering.
My feeling is that for those who have electricity on a regular basis, it would be pretty easy for a couple to eat well for an extended period of time with just an Instant Pot and a one-burner stove.
(I’d probably want to bring along at least one extra stainless steel insert if I were going to be using the Instant Pot that frequently though.)
A couple of different lids are available for the Instant Pot Mini.
A silicone lid allows food to be stored in the serving pan and then re-heated later in the same pan, rather than needing to be transferred to a storage container in the meantime. I think this is a very good idea since it would save having to wash some messy dishes, which I prefer to avoid as much as possible regardless of whether I am tent camping or RV camping.
Although generally I avoid all glass when camping, the glass Instant Pot lid could be an exception since it promotes functionality of the Instant Pot.
I think the glass lid is better when using the appliance more as a slow cooker than as a pressure cooker or when allowing cooked food to sit in the warm mode so that a serving can be removed from it periodically (as may happen with a group of people eating oatmeal or chili). The lid also allows the Instant Pot to be used to make popcorn.
An alternative to the Instant Pot that I might consider is the VitaClay Multi Cooker, which has become fairly popular among people with an interest in natural health.
The main selling feature for this product is that it cooks the food in an unglazed pot made of a special kind of clay. The pot is said to be especially conducive to creating particularly flavorful stews, roasts and rice dishes.
The pots are reported to have tested as free of lead or cadmium. The company’s website describes the clay as follows:
Natural Zisha clay, the legendary secret behind VitaClay® Chef, was formed over thousands of years by cleansing rainfalls that scrubbed the mountains in southern China, releasing minerals into lakes and forming huge beds of Zisha, known as the “pride of China.” Zisha is the natural organic material that was crafted into ‘LIVING COOKWARE” and highly prized by Emperors to promote health, wellbeing and longevity.
The fine texture and slightly porous nature of purple clay, combined with its low thermal conductivity make it ideal for making food and brewing tea. Purple clay has special characteristics, chemistry, composition, and texture. It has a 4% water absorption rate, and is normally considered to be the best raw material for making chemical free teapots and crockery in the world.
The VitaClay Multi Cooker provides much of the functionality of the Instant Pot, in that it can serve as a pressure cooker, rice maker, slow cooker or yogurt maker. Of course, since it is a clay pot, it cannot be used for sauteeing purposes.
A lower-cost version of the VitaClay – called the VitaClay 2-in-1 Rice & Slow Cooker -provides the same size pot but omits the yogurt-making function.

The VitaClay Multi Cooker.
The VitaClay 2-in-1 also allows fewer programming options. It basically provides the user with just four cooking choices that cover the types of food that the VitaClay does best – white rice, brown rice, stew and soup.
The main complaint that I have read about the VitaClay is that the pot that it comes with sometimes breaks with usage. One person suggested soaking it in water for a while before using it, and so maybe I would try that.
The VitaClay is considerably more expensive than the Instant Pot and has fewer different functions. In addition, for camping purposes, the clay insert is one more thing that I would have to worry about since it would have the potential of breaking.
Still, I am interested enough in the concept of clay pot cooking that I am a little drawn to the idea of giving it a try.
Multi Cookers:
Instant Pot Lux Mini 6-in-One, 700W, 3 Qt. $60.
Instant Pot Mini 7-in-One, 700W, 3 Qt. $80.
VitaClay 2-in-1 Rice & Slow Cooker, 600W. $100.
VitaClay Multicooker, 600W, 3.2 Qt. $170.
Instant Pot Accessories:
Instant Pot Silicone Lid, 3 Qt. $8.
Instant Pot Tempered Glass Lid, 3 Qt. $13.
Instant Pot Inner Cooking Pot, 3 Qt. $20.
Hatrigo Instant Pot Steamer Basket, 3 Qt. $25.
Quick & Carry Instant Pot Tote Bag, 3 Qt. $35.
SLOW COOKERS
For most of the time when I was traveling around, I carried with me in a small plastic bin an inexpensive 4-quart Hamilton Beach slow cooker that I purchased at Walmart.
Before I got my RV, I mostly used the slow cooker during the one or two days per week that I spent at hotels. I would prepare a stew and eat some of it, and then put the rest in my cooler to heat up later on my camp stove.
After I got my RV, I used the slow cooker when I was hooked up to electricity for things that took a long time to cook – pot roasts, whole chickens, soups, stews, chilis, pots of baked beans. A couple of times, I used it to roast a whole turkey breast for Thanksgiving dinner.
So all in all, I feel like I got a lot of use out of the slow cooker – especially since it cost less than $30.
Now that the Instant Pot – which acts as a slow cooker but with many more capabilities – is available to those who are pursuing mold avoidance, a question is whether a standalone slow cooker is worth considering.
One consideration is whether slow cookers (most of which have glazed ceramic inserts) may pose a problem with regard to leaching heavy metals into food.
All the major brands say that they are in compliance with the government’s regulations with regard to lead and other heavy metals, but pretty much leave it at that.
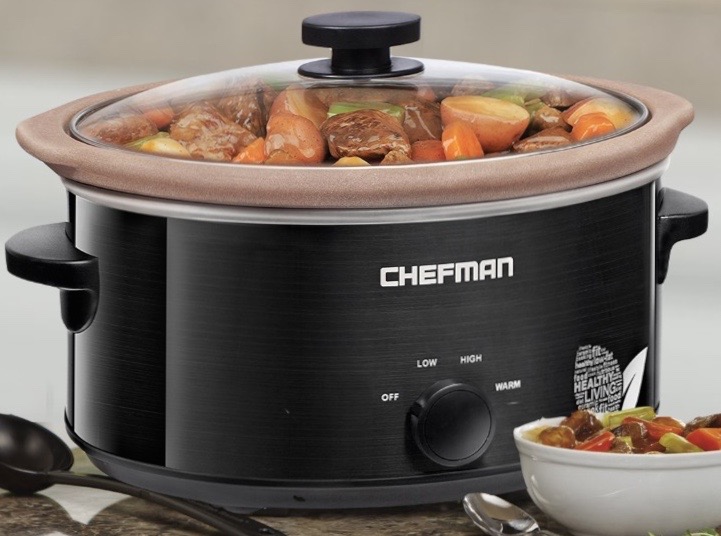
The Chefman Slow Cooker with Natural Stoneware Crock.
That does not really alleviate my concerns though.
For one thing, it seems to me that long cooking would be especially likely to leach metals into food (especially if something like tomatoes, lemons or wine is used in the broth).
In addition, I do not believe that the government is proactive enough with regard to toxicity issues, and so being in compliance with government regulations seems to me a low bar.
A couple of slow cooker brands have addressed the issue of heavy metals in a more proactive way though.
One is Chefman, which recently introduced a cooker with an unglazed clay insert that it says has “75% less lead than traditional slow cooker crocks.”
The other is VitaClay, with its 2-quart combination of personal yogurt maker and slow cooker (as well as its larger multi cookers).
As for the other companies, while I think it probably are telling the truth about not using lead in their glazes, likely some level of heavy metals from the clays are present in most of these pots and have the potential of getting into foods.
The question is whether that level is enough to make a difference for people who already have toxicity issues and who may have impaired detoxification capabilities.
In the case of the small slow cookers being used in the car, I think the advantages of using a small slow cooker for that purpose could be great enough for some people that it could be worth doing even if there was some low level of exposure to heavy metals as a result.
If it were me though, I likely would choose the VitaClay model ($40) rather than one of the others if I could afford it.
In addition, I think that having a larger slow cooker of some kind can be really helpful to some people when they are on the road.
Although I think that the Instant Pot (or maybe one of the VitaClay cookers) is the best choice for this, regular slow cookers are much less expensive as well as less bulky.
If I were going to buy a regular slow cooker, I might choose the Chefman version. While I’m not sure that company has proven that its slow cooker is actually better in terms of lead or other heavy metals than other products on the market, at least they are talking about the issue.
Otherwise, I might choose a Crock-Pot or a Hamilton Beach product, just because it seems that their products have good reputations in other ways.
Following is the statement about heavy metals from Crock-Pot:
Crock-Pot® continues to proactively test its products for lead and other toxic metals, with the results continuing to come back favorably. Lead is not an additive in the Crock-Pot® slow cooker ceramic glaze. Crock-Pot® is diligent in its efforts to ensure that its products are compliant with applicable regulations as well as industry standards, such as Food and Drug Administration (FDA) regulations regarding the presence of lead.
Following is the statement from Hamilton Beach:
Hamilton Beach specifications applicable to all slow cookers and their components (including the earthenware crocks) prohibits the product from containing any measurable amounts of lead. Furthermore, the factories that manufacture the earthenware crocks for Hamilton Beach are certified ceramic production facilities whose ceramic ware is deemed to satisfy FDA heavy metal requirements. Hamilton Beach takes all reasonable steps to ensure that the earthenware crocks accompanying our slow cookers provide safe and satisfactory service to our consumers.
Slow Cookers:
Chefman Slow Cooker with Natural Stoneware Crock, 240W, 5 Qt. $33.
Additional Information:
Real Food RN – Slow Cookers and Lead
Deep Roots at Home – Slow Cookers Leaching Lead
HOT PLATES
Especially for those with frequent access to electricity, a single-burner electric stove could be a useful and fairly compact cooking tool.
Hot plates use quite a lot of electricity though, and so are not all that well-suited to running from battery power. I mostly would plan to bring one on the road if I were planning to spend much of my time in an RV with an electric hookup and an indoor kitchen setup.
Although I think that an Instant Pot would be a better choice for cooking in hotel rooms, a single burner electric stove also possibly could be used.
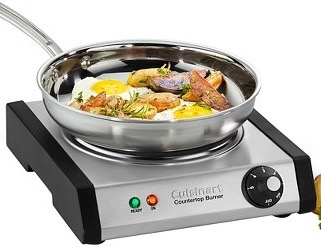
The Cuisinart Cast Iron Single Burner Stove.
However, since many hotels are not very happy about the idea of guests cooking in their rooms, I would be inclined to restrict any cooking that I did in the room to dishes that did not create much smoke or odor (and perhaps to keep the unit put away in a carrying case during the times that I wasn’t using it).
The Cuisinart single burner stove – which includes a cast iron plate – is probably the option that I would choose.
However, especially since I like my Secura kettle so much, I might be interested in the Secura Induction Cooktop too.
A few less expensive models that get reasonably high ratings are available as well.
Single-Burner Electric Stoves:
IMUSA Electric Single Burner, 1100W. $16.
Proctor Silex Fifth Burner, 1000W. $30.
Cuisinart Cast Iron Single Burner Stove, 1300W. $57.
Secura Portable Induction Cooktop Burner, 200-1800W. $130.
ELECTRIC KETTLES & PERCOLATORS
I have a Secura Kettle (1500 watts) in my home kitchen and use it several times a day.
The stainless steel interior produces hot water that feels and tastes good to me, and it is a lot less trouble than heating water in a kettle on the stove.

The Bonavita Mini Kettle.
Unfortunately the Secura is a pretty bulky to bring on the road, and so I put some effort into finding some smaller alternatives that have only stainless steel (rather than plastic) touching the water and that seem to get generally good reviews.
These include the Bonavita Mini Kettle, the Aicok Gooseneck Electric Kettle and the Chef’s Choice Electric Kettle.
Also, Farberware offers an electric percolator that might be useful either for heating water or making coffee.
Although all of these have high wattage levels, they also only take a few minutes to heat up a pot of water.
Although I would not rely on them as my only way to heat water off-grid, conceivably they could be used occasionally to heat water indoors with just a battery when it would be inconvenient to use an outdoor camp stove, such as at night when the weather is bad.
Electric Kettles:
Aicok Electric Gooseneck Kettle, 1000 watts, 1 Liter. $32.
Bonavita Mini Kettle, 900 watts, 0.5 Liter. $40.
Secura Electric Kettle, 1500 watts, 1.8 Qt. $40.
Chef’s Choice Cordless Electric Kettle, 1500 watts, 1 Qt. $55.
Electric Percolators:
Farberware Percolator, 1-3 Liters, 1000W. $50-80.

The Lodge Cast Iron Mini-Wok.
COOKWARE
When I first started out camping in 2008, I went to Target and bought three pieces of cookware – two 3-quart pots (which nested inside of one another) and a frypan.
I ended up using those three pots for virtually all of my cooking needs over the next few years when I was on the road. Eventually I also got a slow cooker, which I used mostly for stews, soups, roasts, and pots of baked beans.
Although this cookware selection was far more limited than the large numbers of pots that I had in my kitchen at home, I found that I was able to cook pretty much anything that I wanted to in them. I was really surprised at how versatile they were.
There were some downsides to this cookware selection, however. For one thing, although all three of my pots nested together, the long handles took up a lot of room in my storage bins.
In addition, because the pots were aluminum with non-stick finishes, they definitely were not the safest choice.

The pot I use the most – a Le Creuset 2-quart French oven in the Flame color.
Recently in a regular house, I have been using pots and pans made only of stainless steel (as the insert in my Instant Pot and for boiling pasta or steaming vegetables) and Le Creuset enamel-coated cast iron (for everything else).
I also would consider cooking in regular cast-iron or in glass.
If I were going to consider a new type of pan or finish, then I would need to be convinced that it was markedly better from a functional perspective than the tried-and-true pans that I currently am using and also that there was a very good reason to believe that it was safe.
So far, whenever I have considered new types of cookware, I haven’t found that they have met that standard.
Admittedly though, the cookware that I am currently willing to use does have some drawbacks for use on the road.
Cast iron, whether ceramic-coated or not, is extremely heavy and rather bulky, and glass is totally impractical since it breaks easily.
Stainless steel in some ways is a good compromise, except that I usually end up burning things when I use it (especially on camp stoves where the temperature often is not very adjustable).
An additional problem with stainless steel (more than cast iron) is that almost all stainless steel pots have long handles that take up storage space.
I therefore am thinking that I am going to want to take a mix of stainless steel and cast iron cookware on the road with me, to fulfill different cooking functions.
The challenge, however, is to choose the right ones so that they work well for me and do not take up an inordinate amount of space.
Following are some options that I think are worth considering.
Additional Information:
STAINLESS STEEL COOKWARE SETS
Starting out, I found a few cookware sets that I think could have potential for me or for other mold avoiders trying to decide what pots and pans to bring on the road.
The first is a seven-piece set from Cuisinart. It has four stainless-steel pans – an 8-quart stockpot, a 3-quart saucepan, a 1 1/2-quart saucepan, and a 10″ skillet. (The other three pieces are lids.)
I think that if I were to buy this set, that it (along with an Instant Pot) would be pretty much totally sufficient for my cooking needs and I wouldn’t need to bring anything else.

The Cuisinart 7-piece cookware set.
The downsides of this choice, though, would be 1) the handles on the pots are long and would waste a lot of space, 2) the smaller pans do not nest inside the largest one, and 3) I would likely burn a lot of foods because all the pots are stainless steel.
Still, I think this set would work for me and also would be reasonable in terms of total price.
Another set with a mix of smaller and larger stainless-steel pans is the Magma Products Gourmet Nesting Cookware Set.
It includes a 5 quart stockpot, a 2-quart saucepan and a 9 1/2″ saute pan. The latter two pans share a removable handle, and all the pans nest together for storage.
A larger version of the set also includes 3 quart and 1 1/2 quart saucepans, with all the pieces nesting together.
In addition, a separately available colander also would nest with the other pots and pans in this set.
I had never heard of Magma Products (which is a grill manufacturer) before, and I am rather concerned about a few of the Amazon reviews that reported problems especially with the detachable handle (and to a lesser extent with the pans in general).
Insofar as they are not really well-made, these pans seem pretty expensive – for instance, the 3-pan set is twice the cost of the Cuisinart set.
In any case, I’m not very enthusiastic about doing all my camp stove cooking on stainless steel and so will not be buying these myself. They could be an option for others to consider, however.
In addition, the European company Primus offers specifically for camping purposes two sets of smaller stainless-steel pots.
The larger set ($100) has a 3-quart pot, a 2-quart pot, a frying pan. The smaller set ($65) includes a 2-quart pot, a 1-quart pot, and a frying pan. (The 3-quart pot is also sold individually.)
All the handles for both sets of pots fold up for easy storage. All the pots also have colanders integrated into their lids for easy draining.
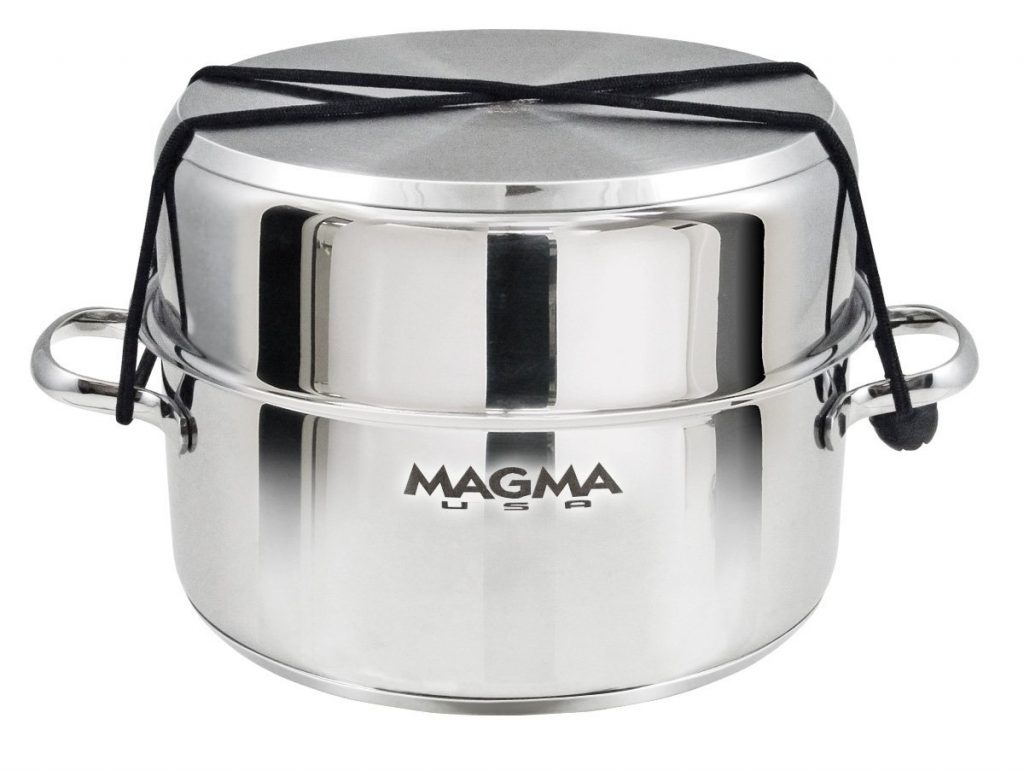
The complete Magma Gourmet Nesting Cooking Set packed for storage.
Stansport – another a camping company – makes a set of stainless steel pots and pans with a detachable handle.
The set includes a 4-quart pot, a 3-quart pot, a 2-quart pot, a 1-quart pot, a 10″ frypan, and a universal lid that fits the smaller three pans.
As of this writing, the price on Amazon is only about $50, and the reviews look pretty good.
The Stanley Base Camp Cookset includes a 7″ fry pan and a 3.5 liter pot. The handles fold up rather than permanently sticking out, and everything fits neatly into the large pan for compact storage.
Unlike many of Stanley’s camping sets that are meant for backpacking, the pots have heavy bottoms to make burning less likely.
(Also included in this kit is a bunch of plastic stuff, stated to be BPA-free, including plates, bowls, sporks, cutting board and dish drying rack. I likely would get rid of much of this, though conceivably the plates could be used to hold paper plates.)
If I were going to go really minimalist and bring along just two pans to meet all my cooking needs, this might be a reasonable choice.
The pot could be used for heating water and for general cooking, and the frypan is large enough that it could be used for things like cooking many types of vegetables as well as frying meat or fish.
I do think that I would get very frustrated with having only one pot and with trying to cook only in stainless steel, however. In addition, only being able to heat 3.5 liters of water at a time likely would not be optimal if my goal is to use the hot water for taking a shower.
Still, I do see some real benefit in this set, on its own or in conjunction with some additional cookware pieces.
The Snow Peak Al Dente Cookset includes a 7-quart pot (9″ x 6.25″), a 4.5 quart pot (7.8″ x 5.5″), and a strainer.
The set is from Japan, where people are very concerned about not wasting space and about aesthetics. It feels very Japanese to me and I am really drawn to purchasing it for that reason.

The Snow Peak Al Dente Cookset.
It is made in Japan.
From a functional point of view, the best thing about this set is that the handles all fold down and the three pieces nest together.
The strainer can be used as a colander (for draining pasta or washing vegetables) or for steaming vegetables in one of the pots.
Although at first I wondered if I need two large pots like this, I think I would end up using them both very frequently – for heating water, for rinsing vegetables, as a wash basin when taking sponge baths, for washing clothes, for washing dishes, and for a variety of cooking purposes.
It also might be very helpful to be able to be cooking something in one of the pots (or to have the leftovers stored in the pot in the cooler) and still be able to heat water in the other pot.
The multi-purpose nature of the strainer should be very helpful too, since it would replace both the colander and the vegetable steamer that I otherwise would be inclined to bring along.
Of course, if I buy this set, then I still will have to bring along a few smaller pans to complement it.
I’m really close to feeling like this would be a smart choice though. The fact that I feel sure that it is super-high quality and that Snow Peak offers a lifetime guarantee on everything it sells is just a bonus.
Stainless Steel – Cookware Sets:
Primus Campfire Cookset, 3 Pans. $65-100.
Cuisinart 7-Piece Cookware Set, 4 Pans. $70.
Stanley Base Camp Cookset, 2 Pans. $80.
Stansport Deluxe Family Cookset, 5 Pans. $84.
Snow Peak Al Dente Cookset, 2 Pans. $100.
Magma Products 7-Piece Gourmet Nesting Cookware Set, 3 Pans. $142.
Magma Products 10-Piece Gourmet Nesting Cookware Set, 5 Pans. $178.
STAINLESS STEEL & TITANIUM COOKWARE
I also made a list of some other possible large stainless-steel pots for boiling water. However, a problem with all of these is that they either have handles that stick way out on each side and take up space (most of the pots) or that they do not have any handles at all (the Instant Pot inserts).

The Tramontina 8-Quart Covered Stainless Steel Pot with Pasta Drainer.
Although I like the idea of being able to drain water when cooking pasta from some of these pots without a colander (as offered by Tramontina and Farberware versions), I actually would need some kind of strainer anyway in order to rinse vegetables.
The mesh strainer from the Snow Peak pans is much more appealing, therefore.
At home, I have a really large vegetable steamer that I use routinely for various vegetables (including entire cabbages cut into wedges).
However, on the road, having a pot with a steamer basket seems rather wasteful in terms of space. A steamer insert such as the Snow Peak one would be better.
I have never owned a stainless steel multipot before, but think I may buy one with the primary intention of using it to boil water for coffee or tea. Conceivably I may cook in it on occasion too, but I doubt I will use it frequently as a serious cooking pot.
My plan at this point is to buy a 3-quart Instant Pot and to use it on the road when I have electricity. The insert in it is stainless steel with a heavy bottom, which does not have handles but nonetheless can be used as a cooking pot on my camp stove.
One thing that I am thinking is that if I cook dishes such as stews in the Instant Pot when I have electricity, then I may store the leftovers in the stainless steel insert (with a storage lid) in the cooler. Then later, when I do not have electricity, I can reheat those leftovers on my camp stove in the same pot.
The Norpro Krona Multi Pot.
If I do it that way, then I am thinking I may want to bring along an extra Instant Pot insert so that I can still use the appliance even after leftovers have been stored.
With two Instant Pot inserts available for use on my camp stove, I wouldn’t need much else to cook in other than maybe a frying pan. So that would be one way to approach this.
Although I don’t see myself ever buying and using a stainless steel frying pan, I listed some possibilities that I think may work well for others if they don’t want to bother with heavy cast iron frypans.
I also listed some stainless steel and titanium backpacking cookware, even though I don’t intend to buy those either unless someday I get really inspired and decide to go backpacking.
For those who want to be really minimalist when on the road though, backpacking cookware could be worth a look.
Stainless Steel – Large Pots:
Instant Pot Inner Cooking Pot, 6-9 Qt. $30-35.
Tramontina Covered Stock Pot with Pasta Drainer, 6 Qt. $32.
Cuisinart Chef’s Classic Stockpot with Cover, 6 Qt. $36.
Tramontina Covered Stock Pot with Pasta Drainer, 8 Qt. $40.
Farberware Covered Straining Stock Pot, 8 Qt. $89.
Stainless Steel – Steamer Pots:
Norpro Mini Steamer Cooker, 1 Qt. $30.
Kuhn Rikon 4200 4th Burner Pot with Steamer Basket, 3 Qt. $38.
Farberware Covered Stack ‘n’ Steam Saucepot and Steamer, 3 Qt. $70.
Stainless Steel – Smaller Pots:
Instant Pot Inner Cooking Pot, 3 Qt. $20.
Norpro Krona Multi Pot, 2 Qt. $20.
Norpro Krona Stainless Steel Multi Pot with Lid, 2 Qt. $35.
Norpro Krona Stainless Steel Multi Pot with Lid, 3 Qt. $42.
Primus Campfire Stainless Steel Pot, 3 Qt. $45.
Steamer Baskets:
Sunsella Stainless Vegetable Steamer Basket. $13-18.
Home Chef Steamer Insert. $35.
Magma Products Accessory – Gourmet Nesting Colander. $33.
Stainless Steel – Fry Pans:
GSI Outdoors Glacier Fry Pan, 8-10″. $30-35.
Stanley Prep and Eat Frypan Set, 7″. $35.
Primus Campfire Stainless Steel Frying Pan, 8-10″. $41-50.
Stainless Steel – Lightweight Backpacking Pots:
MSR Alpine Stowaway Pot, 0.5-1.7 Qt. $16-25.
Stanley Cook & Store Set, 32 ounces. $30.
Snow Peak Personal Cooker, 3 Pot Set. $30.
Stanley Adventure Prep & Cook Set, 1.5 Qt. $40.
Titanium:
CAST IRON COOKWARE
Recently I purchased the Lodge 9″ Mini-Wok and think that it has great potential as a pot that I could bring on the road and use for many different functions.
The first thing I did with the mini-wok was to fry some bacon in it (which is always a good idea when dealing with new cast iron). Even though the sides are sloped, I found that it did a lovely job with three pieces of bacon at a time.
The pot is designed to produce stir fries appropriate for one or maybe two people, and it does that very nicely.
But I also have found that the flat bottom does a fine job cooking a single hamburger, pork chop, steak, grilled cheese sandwich (using regular square-shaped bread) or fried egg.
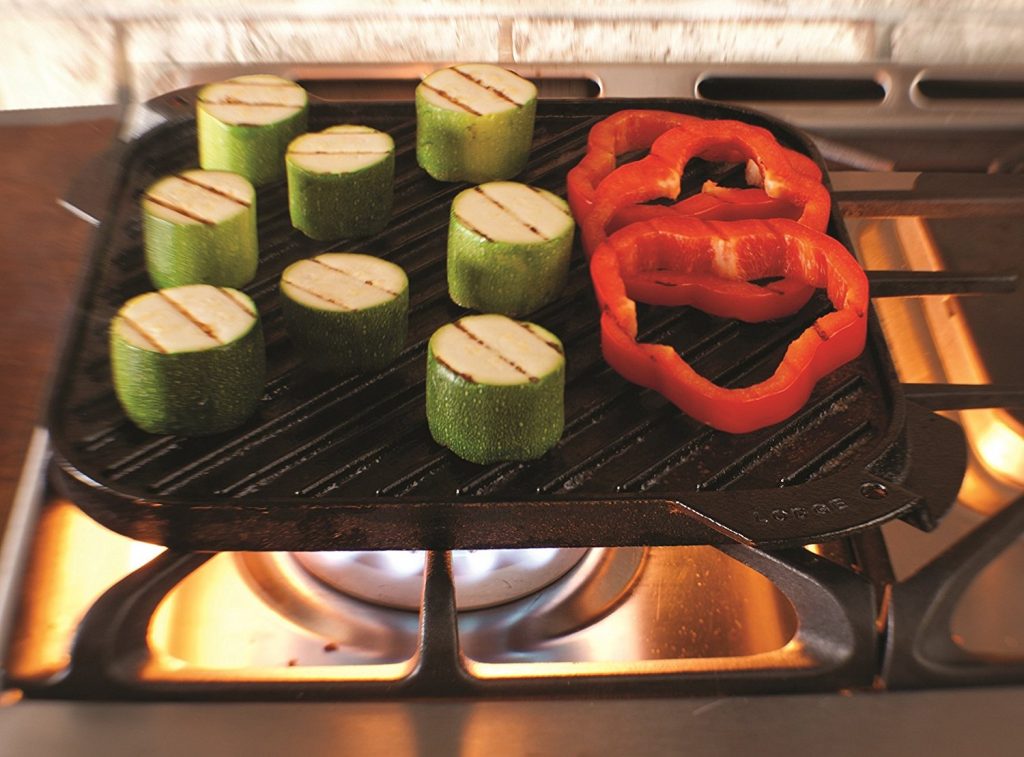
The Lodge Single Burner Grill/Griddle.
It also is really good for almost all kinds of leftovers, and in a pinch could even be used to heat up soup.
The pot holds a total of 2 quarts. I am thinking that if I were to purchase a lid for it, it likely would be even more versatile.
I actually feel that I could go for quite a long time on the road with just this one cooking pot (along with a large pot to heat up water for general campground use and a Norpro Multi Pot to boil water for tea), using just a one-burner camp stove. That is a very freeing thought.
However, one additional item that I am pretty sure I am going to buy regardless is the Lodge Single Burner Grill/Griddle.
The best thing about it is that it is flat and therefore will take up a minimum amount of space.

The Lodge 2-Quart Cast Iron Dutch Oven.
While I can get away with using the bottom of the mini-wok as a griddle for one person, the Lodge Single Burner Grill/Griddle would provide considerably more surface space and therefore allow at least one additional person to be easily fed.
In addition, since I don’t really have room for a grill stove, the idea of flipping over the burner plate to serve as a pseudo grill is very appealing.
Although I have yet to try it, I also think that the Lodge Single Burner Grill/Griddle might serve as an effective flame diffuser on camp stoves that tend to produce overly high heat (e.g. almost all such stoves except for the Eureka and Jetboil models).
This could be helpful for those who are planning to do their day-to-day cooking in stainless steel or other thinner pots, in terms of preventing burning.

A Lodge Dual-Handle Pan.
A third attractive Lodge cast iron piece for camping purposes is the Lodge 2 Quart Dutch Oven.
I have found this size pot to be my favorite for day-to-day general cooking as well as for reheating.
It would be especially helpful for preparing certain dishes (such as rice, oatmeal and popcorn) that would not be very well-suited to the mini-wok.
The smaller Lodge Dual-Handle Pans seem like another good possibility, to provide the functionality of a traditional skillet but without a long handle to take up space.
The dual-handle pans are available in several sizes – including 8″ and 10.25″ – and are specifically designed for camping purposes (among other uses).
A really good thing about these four types of Lodge cast-iron pans is that they all would stack together nicely for travel purposes.
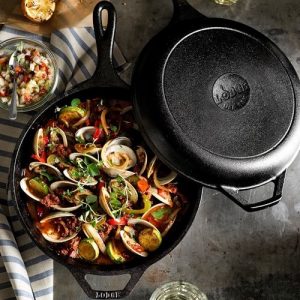
The Lodge Cast Iron Combo.
The Lodge 2 Qt. Dutch Oven sits neatly inside the Lodge Mini-Wok, which then sits inside the 10.25″ Lodge Dual Handle Pan.
All of these could then sit on top of the Lodge Single-Burner Grill/Griddle in a storage bin.
That combination of four items – along with a large stainless steel pasta pot and some kind of teapot – would make it easy to prepare pretty much anything imaginable for two or maybe even three adults, with a minimum amount of storage space required.
Another possibility from Lodge is their Cast Iron Combo Cooker, which is a combination of a 3.2-quart Dutch oven with a shallow 10″ skillet lid.
This is a quite heavy and rather large pot duo, especially with the long-ish handles.
However, it’s also a set that could be used to produce a wide range of meals for one or two people, without any other cooking pans needed.
Moreover, this set is very reasonably priced (currently $35 on Amazon) and is often available in local stores. If I were going to pick a “Best Buy” cookware item for those going camping, this would very likely be it.
Finally, I am a little interested in the line of individual-serving pans recently introduced by Lodge.

The Lodge Cast Iron Round Mini Server.
Maybe, for instance, I could use one of those dishes to heat up an individual portion of leftovers on my camp stove and then eat it out of the same dish.
That is actually a little appealing to me, since a small pot like that would be a lot easier to have readily available for cooking purposes than a larger cooking pot would be.
I wonder if I would end up using a little pot like that frequently enough to make it worthwhile to bring it along.
Cast Iron Pans:
Lodge Cast Iron Dual Handle Pan, 12″. $20.
Lodge Cast Iron Dual Handle Pan, 8″. $25.
Lodge Cast Iron Dual Handle Pan, 10.25″. $28.
Lodge Cast Iron Dutch Oven, 2 Qt. $31.
Lodge Cast Iron Mini Wok, 9″. $37.
Lodge Cast Iron Combo (3.2 Qt. Dutch Oven + 10″ Skillet). $37.
Lodge Cast Iron Single Burner Grill/Griddle, 10.5”. $47.
Cast Iron Mini Servers:
Lodge Round Mini Server, 14 oz. $16.
Lodge Mini Serving Bowl, 12 oz. $16.
Lodge Oval Mini Server, 16 Oz. $20.
ENAMEL-COATED CAST IRON
When at home, the pot that I use the most is a small Le Creuset Enameled Cast-Iron 2-Quart French Oven with dual handles.
The pot is a little heavy but doesn’t take up much space, and so I am considering bringing it on the road.
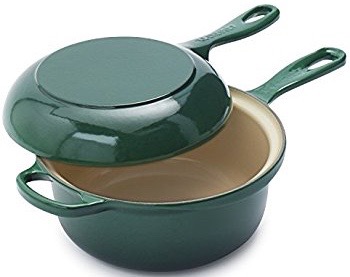
The Le Creuset Multifunction Pan
In addition, recently I saw at a Sur La Table store a 2-piece Le Creuset item with a 2.5 quart saucepan and an 8″ skillet that also serves as a lid for the pot.
This Le Creuset Multifunction Pan (also called a 2-in-1 Pan) comes in a variety of really pretty colors – green, yellow, light blue, indigo blue, orange, red – and I feel like I would get a lot of use out of it.
Unfortunately, this item has moderately long handles that would waste some space in my storage bins, and it’s also a little pricey ($200).
Still, those two pieces would be so versatile (and so much fun to use) that I am tempted to buy it anyway, for use both on the road and at home.
Another very interesting pot is the Le Creuset 1 1/2 Quart Brasier.
It is a dual-handle pot that would have all the functionality of an 8″ frying pan, but with even more versatility due to its greater height (3.4″) and its heavy lid.
I have the Le Creuset 3 3/4 Quart Brasier at home and use it almost every day, but it is far too large to bring on the road. The 1 1/2 quart version could be really nice though.
Although I really like Le Creuset’s cookware, it certainly is expensive compared to many other alternatives.
One of the reasons for this, I suppose, is that all of the enamel-glazed cast iron cookware from Le Creuset is made in France.

The Le Creuset 1 1/2 Quart Brasier. Photo Credit: Chez Bonne Femme.
In a pretty new development, quite a few companies now sell enamel-glazed cast iron pots at prices that are much more reasonable than those offered by Le Creuset or by other French brands such as Staub.
Most of these pots are made in China, with prices in the $40-60 range (compared to $200 and up for the French brands).
Probably if I were going to try one of these lower-priced products, I would start with the ones made by Lodge since I already have had good experiences with that company’s regular cast iron products.
Although Lodge manufactures its regular cast-iron products at its factory in South Pittsburg, Tennessee, the company website states that the enameled cast-iron products are made in China because they were unable to find any plant in the U.S. that was able to enamel bright colors.
(As a side note, the ceramic cookware and dishes from both Le Creuset and Staub, as well as the large enamel-glazed stainless steel pots from Le Creuset, are all made in China too. For French ceramic tableware that actually is made in France, I really like the Emile Henry line.)
The Lodge website also states about its enameled cast iron:
Lodge utilizes the U.S. Food and Drug Administration Test Procedure 7.5.1.4a Leachability of Lead and Cadmium for Glazed Ceramic Surfaces. The FDA Division of Compliance Programs uses ASTM-C738 as the Standard Method of Test for glazed ceramic. In addition to information provided by vendors, Lodge Manufacturing Company uses third-party testing to ensure that products with the Lodge name comply with standards set forth by the United States Food & Drug Administration. All our domestic as well as imported cookware complies with the FDA Standards. We are also in compliance with California Proposal 65, the world’s most rigid standard for lead and cadmium content.
We work with U.S. owned third-party inspection teams to ensure that quality is up to Lodge standards, and that all partner companies comply with all applicable employment laws and regulations.
In general, the Lodge enameled cast iron products seem to be getting fairly good reviews from critics and consumers, and I haven’t heard any specific negative reports crop up with regard to toxicity issues.

The Lodge 1 1/2 quart Dutch oven.
Based on what I have read though, I would not expect enamel on the Lodge pots (or any other inexpensive pots made in China) to hold up as well as it does on Le Creuset pots.
Still, the enameled Lodge pans seem like they probably are good enough and safe enough that they could be worth considering. I don’t know that they will become heirloom pieces, but they are pretty and colorful and hopefully will hold up for at least a while.
Both the 1 1/2 Quart Dutch Oven and the 3 Quart Dutch Oven seem like they would be useful as well as visually appealing choices for camping purposes.
Lodge also makes a 3.6 Qt. Enamel-Coated Casserole Dish with an 11″ cooking surface diameter. It sounds like a versatile and useful pan (similar to my large Le Creuset brasier), but probably I would be hesitant to bring it on the road since it would not fit very well on most camp stoves.
Enamel-Coated Cast Iron:
Lodge Enamel Dutch Oven, 1.5-3 Qt. $70-90.
Le Creuset Enameled French Oven, 2 Qt. $200.
Le Creuset Enameled Brasier, 1.5 Qt. $200.
Le Creuset Enameled 2-in-One Pan (2.5 Qt. Saucepan + 8″ Skillet). $200.
Additional Information:
Chez Bonne Femme – Le Creuset 1 1/2 Quart Brasier
POT LIDS
Another thing to think about is pot lids, since those can take up a lot of additional space.
If the cookware selected seems to have too many different lids, all of slightly different sizes, then it may be a good idea to think about replacing them with a universal pot lid such as the Cleverona or Ecolution.
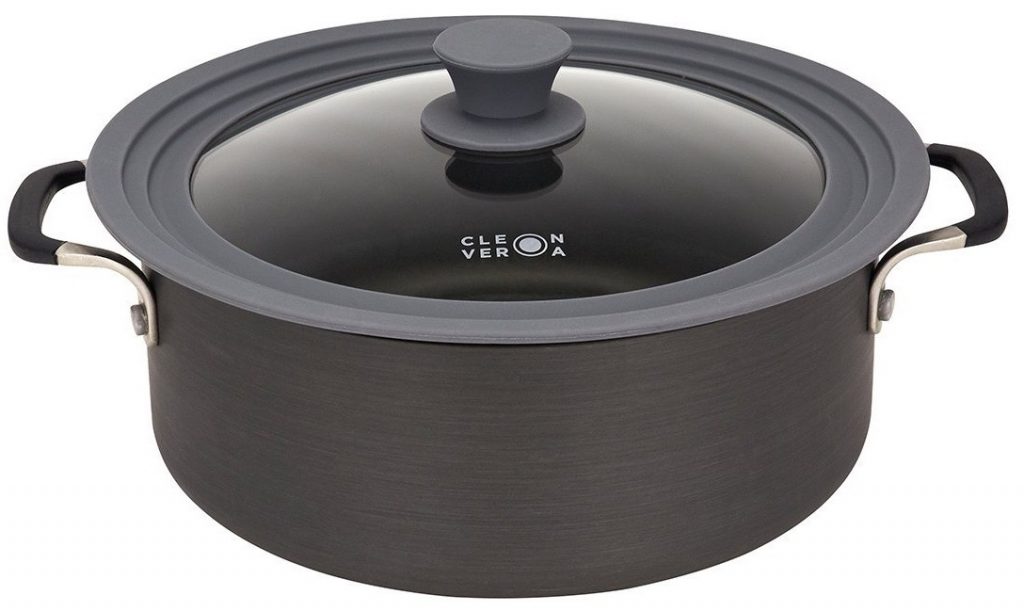
The Cleverona universal pot lid.
While these pot lids are not as functional as heavy cast iron lids for cooking foods for long periods of time over low heat, for the most part that is not the kind of cooking that I would be doing on my camp stove anyway.
Rather, that is the kind of item that I would use an Instant Pot or a slow cooker to prepare. The camp stove is much more for day-to-day cooking requiring just a lightweight lid, if any.
Although those universal pot lids have some glass in them, I would guess they are sturdy enough that they will not break if a little care is taken in packing them correctly.
Pot Lids:
Cleverona Universal Lid (Medium or Large). $18-19.
Ecolution Universal Glass Tempered Lid (Small or Large). $26-30.
BAKING PANS
I really like baking in cast iron pots and pans, in terms of both the quality of the baked goods produced (usually golden and crunchy crusts with soft interiors) and the lack of toxicity.
Therefore, if I were experimenting with the Coleman Camp Oven, likely I would just start out by trying whatever cast iron cookware that I already had on hand for baked goods to see how it worked.
Possibly I also might consider bringing along the Lodge muffin pan or loaf pan.

The Lodge Cast Iron Muffin Pan.
I’ve never made cookies on a cast-iron griddle, but I bet that would work out really well too.
I actually would be a little hesitant to use anything other than cast iron in the Coleman oven since my fear would be that the heat will be so intense at the bottom of the oven that it might burn things in other kinds of pans.
However, a small stainless steel baking pan designed for use in toaster ovens could be an option to try.
I might also consider buying some of the items in the Nordicware set, which is the one that most people seem to use with the Coleman oven.
If I did that though, then I would use waxed paper or cupcake liners to protect my food from the non-stick surface of those pans.
Baking Pans:
Nordic Ware Compact Ovenware. $11-24.
Team Far Toaster Oven Stainless Steel Pan, 8″x10″. $12.
Lodge Cast Iron Muffin/Cornbread Pan. $19.
Lodge Cast Iron Loaf Pan. $20.

The Stanley Classic Vacuum Bottle.
COFFEE & TEA
Although it is possible to heat water for coffee or tea (or for other camping purposes such as washing up) in a regular cooking pot, I think it is a good idea to have a designated pot for that since other pots often have food in them and because a pour spout is convenient.
I possibly may purchase a Norpro Multi Pot with Lid for this purpose, since then I also could use the pot (which seems to have a pretty substantial bottom) for other cooking purposes. (Multi pots are discussed in the previous section on cookware.)
Otherwise, a stainless steel percolator or teapot would be possibilities for boiling water on a camp stove.
A backpacking stove would be a more compact way to boil a couple of cups of water for tea or coffee. In that case, a stainless steel cup designed for backpacking purposes might work better.
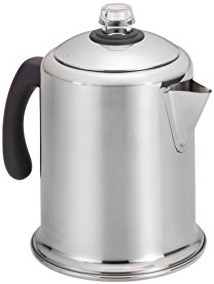
The Farberware Classic Yosemite Stainless Steel Percolator.
The Stanley Cook & Brew Set includes a 32-ounce backpacking cup with a French press attachment, for instance.
Jetboil portable cup stoves (discussed in the section above on Backpacking Stoves) also are a popular choice for making coffee or tea while camping.
If coffee is not brewed in a percolator or in the cup used to heat the water, then it could be poured into a separate French press to make coffee.
Many different companies now offer French press attachments that are incorporated into insulated travel mugs.
Unfortunately, however, all of the ones that I have been able to find so far, have plastic components inside the mug touching the hot coffee.
I found a couple of non-insulated coffee presses – the Linkyo and the Securo – that are plain stainless without any plastic or glass.
In addition, the Snow Peak Titanium Coffee Press is a very lightweight press that holds two cups of coffee.
I am especially interested in the Snow Peak Cafe Latte Set, which includes the titanium coffee press plus a milk frother (also free of internal plastic) that can be used without electricity.

The Secura Stainless Steel French Press.
For those who are looking for a larger press without the ability to serve as a travel mug, the Stanley and Coffee Gator presses keep coffee hot for many hours, without the presence of any glass and without exposing the hot coffee to any plastic.
As an alternative to a French press, I have tried out the Aeropress and have used it on occasion to make a cup of coffee at a time. I do think that the resulting coffee tastes a little bit better than coffee that I make with a French press. The device is also quite compact, taking up virtually no space in the vehicle.
Although I am not happy with the fact that the Aeropress is made of plastic, it at least does not feel noticeably toxic to me. (For what it’s worth, Dave Asprey of Bulletproof promoted the Aeropress in one of his seasonal grab-bag boxes of gadgets he likes, by the way.)
Another way to brew coffee is by putting coffee grounds in a filter over a cup and then gradually pouring hot water over them, duplicating the results that would be obtained at home with an electric drip coffee maker.
Although I never even thought of looking into finding a manual grinder to use when I did not have access to electricity, I actually was able to find a couple of products on Amazon that had received huge numbers of reviews and that were rated pretty highly.
The For Life Tea Infuser.
One other thing that I will note about grinding is that it might be a good idea with most of these methods to opt for a coarse grind, since there are many complaints about coffee grounds making their way into the cups.
A final option for making coffee on the road is to use instant coffee, and I actually think that Mount Hagan organic coffee is pretty good. It is available in both regular and decaffeinated versions, and with both versions sold in single-serve packages as well as full-size 3.5 ounce jars.
For making tea, I am very fond of the stainless steel For Life Tea Infuser, which I use at least a few times per day regardless of whether I am home or on the road. It can be used to brew drip coffee as well.
I found having a good thermos to be really important when tent camping in cooler weather, since a hot drink could make a very large difference with regard to my comfort level if I woke up in the middle of the night feeling cold.
I have a classic Stanley vacuum bottle and have been happy with it.
Products from the original Thermos company are also reasonably priced and reputed to be good.
A Yeti Rambler Bottle.
More recently, insulated bottles from higher-end cooler companies like Yeti have been creating a lot of buzz.
Personally though, I would be careful about buying any Yeti drinkware since a really high percentage of the items being sold under the Yeti name on Amazon were found to be fake in a study done recently.
Although the fakes may keep drinks hot or cold just as well as the real Yetis, probably I would still be inclined to try to get an authentic Yeti (by buying from an authorized retailer or direct from the company) if I were going to pay that much for the brand name.
Coffee Percolators:
GSI Outdoors Enamelware Percolator Coffee Pot, 8 cups. $20-29.
Farberware Classic Yosemite Stainless Steel Percolator, 8 cups. $25.
GSI Glacier Stainless Coffee Perk, 3-12 cups. $25-44.
Cabela’s Stainless Steel Cool Touch Coffee Pots, 6-12 cups. $30-45.
Stanley Adventure Percolator, 6 cups. $40.
L.L. Bean Stainless Steel Percolator, 14 cups. $70.
Snow Peak Stainless Coffee Percolator, 6 cups. $110.
Mini Kettles:
Snow Peak Kettle Cooker No. 1, 32 oz. $20.
GSI Glacier Stainless Steel Kettle, 32 oz. $32.
Backpacking Stove Cups:
GSI Outdoors Glacier Stainless Cup, 24 ounces. $13.
Stanley Cook & Brew Set (w/ French press), 32 ounces. $25.
Stanley Camp Cook Set, 24 ounces. $30.
Travel Press:
Stanley Classic Vacuum Travel Press, 16 oz. $22.
Bodum Travel Press and Insulated Mug, 15 oz. $25.
Pressopump Kohipress Portable French Press Coffee Maker, $30.
Espro Travel Press, 12 oz. $35.
French Press:
Linkyo Stainless French Press Coffee Maker, 34-50 oz. $17-35.
Secura Stainless French Press Coffee Maker, 34-50 oz. $25-40.
Snow Peak Titanium Travel Press, 2 cups. $55.
Snow Peak Cafe Latte Set (Titanium Travel Press + Milk Frother), 2 cups. $111.
Vacuum Insulated French Press:
Coffee Gator French Press Vacuum Coffee Maker, 34 oz. $60.
Stanley Classic Vacuum French Press, 48 oz. $65.
Aeropress:
Aeropress Coffee and Espresso Maker. $30.
Cone Filters:
Primula Single Serve Coffee Brew Buddy. $6.
E-Prance Honeycombed Stainless Steel Coffee Filter. $17.
Cafellissimo Paperless Pour Over Coffee Maker. $17.
The Brewologist Pour-Over Coffee Filter. $19.
Instant Coffee:
Mount Hagan Organic Instant Coffee.
Coffee Grinders:
Java Presse Manual Coffee Grinder, Conical Burr Mill. $24.
Hario Ceramic Coffee Mill “Skerton.” $45.
Tea Infusers:
Vacuum Insulated Bottles & Carafes:
Thermos Vacuum Insulated Beverage Bottle. $23+.
Stanley Classic Vacuum Bottle. $40+.
Zojirushi Vacuum Insulated Carafe. $36+
Additional Information:
Wellness Mama – Non-Toxic Coffee Makers
Coolers on Sale – Best Coffee Thermos
Best Instant Coffee – The Wirecutter
Outdoor Gear Lab – Camping Coffeemakers
Affiliate Links:
This article includes affiliate links for the Amazon, Walmart and Yeti sites. If purchases are made subsequent to individuals clicking on these links, then I may get a small percentage of the sales price (between 2-8% of the total amount).
I made a special effort to become a Yeti affiliate because reports suggest that such a high percentage of Yeti products sold on Amazon are counterfeit that I did not want to link Yeti pages on there.